

Introduction
Dot mehndi design represents the ultimate beginner-friendly henna technique eliminating intimidating line-drawing requirements through simple press-and-release dot application creating stunning patterns using exclusively circular elements.
This revolutionary approach empowers complete novices achieving beautiful professional-looking results their very first attempt without requiring artistic talent, steady hands, or extensive practice sessions traditionally associated with conventional mehndi application.
The transformative beauty of dot mehndi design lies in eliminating the single biggest beginner obstacle cone pressure control for creating consistent lines.
Dots require only simple perpendicular pressure producing perfect circles every single time regardless of artistic ability, hand steadiness, or previous experience.
This accessibility democratizes mehndi artistry allowing everyone participating in cultural celebrations confidently without intimidation or frustration.
Why Dot Mehndi Design Perfect for Beginners
Dot mehndi design revolutionizes beginner experience by removing technical barriers preventing countless aspiring artists from attempting traditional henna.
Line work demands steady hands, consistent pressure control, and directional movement coordination skills requiring extensive practice developing over weeks or months.
Dots eliminate these requirements completely through simple perpendicular cone pressure producing beautiful results immediately.
Children especially benefit from dot mehndi design because young participants struggle maintaining steady hand control for extended line drawing.
Dots accommodate natural childhood fidgetiness through quick individual applications allowing breaks between elements without disrupting overall pattern integrity. This forgiving nature makes festival preparation joyful rather than frustrating for families with young celebrants.
Working mothers appreciate dot mehndi design’s time efficiency complete wrist bracelets or finger patterns apply in 5-10 minutes using exclusively dots.
Busy morning schedules accommodate quick dot applications impossible achieving with elaborate line-work patterns requiring 30-45 minute uninterrupted sessions.
Elderly participants with trembling hands find dot mehndi design enabling cultural participation previously inaccessible due to line-drawing challenges.
Simple perpendicular pressure produces consistent dots despite hand tremors, allowing grandmothers sharing henna traditions with granddaughters through achievable techniques.
Basic Dot Techniques Mastery
Dot mehndi design success depends upon mastering fundamental dot creation techniques ensuring consistent beautiful results.
Perpendicular Pressure: Hold cone exactly perpendicular to skin surface applying straight downward pressure. This vertical angle produces perfectly round dots every application. Angled pressure creates oval shapes rather than circles undermining dot pattern aesthetics.
Quick Release: Apply pressure briefly then lift cone straight up immediately. This quick release prevents paste spreading creating clean crisp dot edges. Prolonged pressure causes paste flowing outward producing irregular blob shapes rather than defined dots.
Consistent Size Control: Pressure intensity determines dot diameter light pressure produces tiny dots, moderate pressure creates medium dots, firm pressure generates large dots. Practice pressure variations on paper developing muscle memory for size consistency.
Spacing Precision: Strategic spacing between dots creates visual patterns. Equal spacing produces geometric effects, varied spacing creates organic natural aesthetics. This intentional spacing separates beautiful designs from random dot placement.
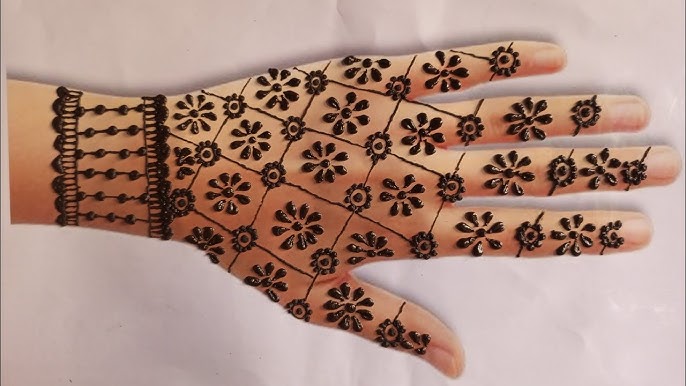
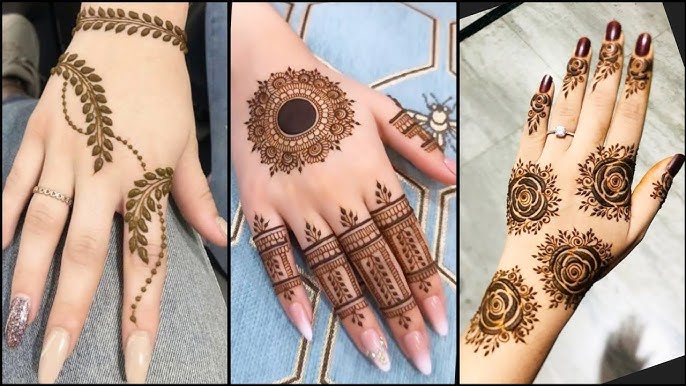
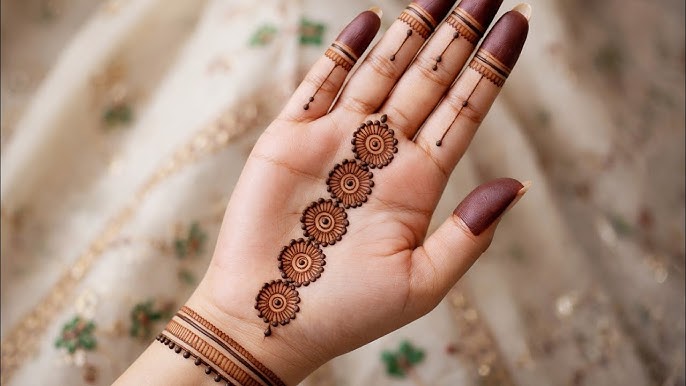
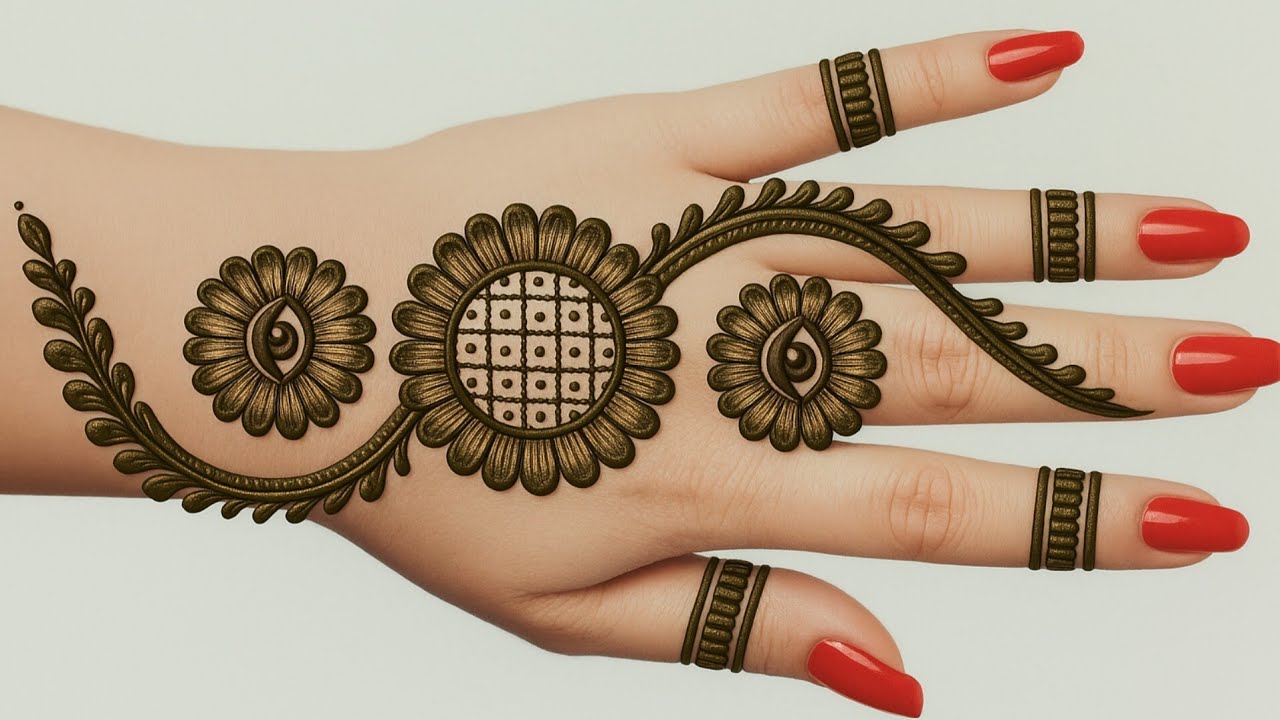
Dot Flower Patterns
Dot mehndi design creating beautiful floral effects using exclusively circular elements.
Simple Five-Dot Flower: Place one central dot surrounded by five equally-spaced dots forming petal positions. This fundamental flower pattern applies in 10 seconds creating complete floral element. Vary dot sizes large center, small petals or vice versa creating dimensional effects.
Layered Petal Flowers: Create multiple concentric dot circles around central dot forming elaborate flower illusion. Inner ring small dots, middle ring medium dots, outer ring large dots produces dimensional blooming effect. This sophisticated technique requires only dot application mastery.
Scattered Daisy Garden: Randomly distribute simple five-dot flowers across hand creating organic garden aesthetic. Vary flower sizes and spacing preventing rigid geometric appearance. This casual approach suits bohemian contemporary style preferences.
Mandala Flower Center: Create circular mandala using exclusively dots arranged in concentric rings. Start small center dot, surround with ring of small dots, continue expanding rings outward with progressively larger dots creating stunning medallion effect.
Geometric Dot Patterns
Dot mehndi design using mathematical arrangements creating architectural precision.
Triangle Dot Framework: Arrange dots forming triangle perimeters with additional dots filling interior space. This geometric approach appeals to contemporary minimalist aesthetic sensibilities. Vary triangle sizes creating nested geometric compositions.
Diamond Grid Pattern: Create diamond shapes using dots at vertices with additional dots forming internal grid patterns. This architectural design photographs magnificently for social media sharing creating clean graphic aesthetic.
Hexagon Honeycomb: Arrange dots forming hexagon shapes tessellating across skin creating honeycomb effect. This nature-inspired geometric pattern delivers sophisticated contemporary appearance using only simple dot technique.
Linear Stripe Dots: Create parallel lines using evenly-spaced dots rather than continuous lines. This striped effect delivers modern graphic aesthetic while maintaining dot-only simplicity perfect for absolute beginners.
Wrist Bracelet Dot Designs
Dot mehndi design creating jewelry-inspired wrist adornment using exclusively dots.
Single Dot Chain: Evenly-spaced dots encircling wrist creates simplest possible bracelet design. Apply in under 5 minutes producing elegant jewelry effect. Vary dot sizes all uniform or alternating large/small creating visual interest.
Double Dot Bracelet: Two parallel dot rings around wrist creates layered bracelet illusion. This doubled effect suggests stacked jewelry creating more substantial aesthetic while maintaining beginner-appropriate simplicity.
Dotted Bangle Stack: Multiple dot rings around wrist with varying spacing creates bangle stack appearance. This minimal yet elegant approach suits professional workplace environments perfectly.
Flower Dot Wrist: Small five-dot flowers arranged around wrist creates botanical bracelet design. Complete entire pattern using only dot technique flower centers, petals, all dots proving beautiful complexity through simple elements.
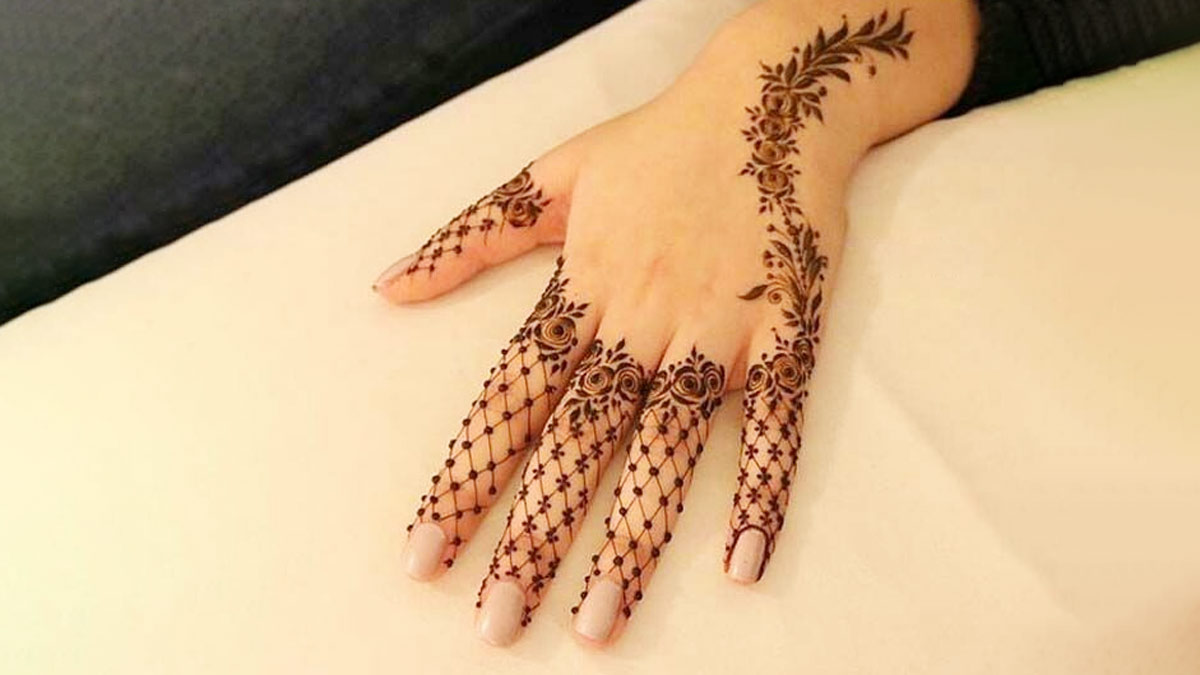
Finger Dot Patterns
Dot mehndi design applied exclusively to fingers creating delicate details.
Finger Ring Dots: Dots encircling fingers at various heights creates ring illusion. This jewelry-inspired minimal placement delivers sophisticated appearance through simple technique.
Fingertip Dot Caps: Small dots decorating fingertips exclusively creates subtle elegant design. This minimal approach maintains professional appropriateness while honoring cultural traditions.
Knuckle Dot Lines: Dots arranged across finger knuckles creates geometric accent design. This understated placement suits conservative workplace environments perfectly.
Dotted Nail Frames: Dots outlining fingernails creates frame effect highlighting natural nail beauty. This contemporary approach photographs beautifully for Instagram sharing.
Kids Dot Mehndi Design
Dot mehndi design perfect for children’s festival participation through quick playful application.
Simple Heart Dots: Heart shapes created using dots arranged in heart perimeter. Children love recognizable shapes applying quickly maintaining cooperation throughout process.
Star Dot Pattern: Five-pointed stars formed using dots at vertices and along edges. This familiar shape requires minimal time producing complete festive appearance children proudly display.
Smiley Face Dots: Happy faces created using dots for eyes, nose, and mouth outline. This playful approach makes henna fun rather than formal for young participants.
Animal Paw Prints: Paw print patterns using dots for pads and toes. Children adore animal themes applying extremely quickly accommodating short attention spans perfectly.
Quick 5-Minute Dot Designs
Dot mehndi design applying in under 5 minutes perfect for rushed mornings.
Wrist Dots Only: Single ring of evenly-spaced dots around wrist applies in 3 minutes. This ultra-quick design delivers complete festive appearance without elaborate time investment.
Corner Flower Dots: One simple five-dot flower in hand corner applies in 2 minutes. This minimal yet elegant approach acknowledges celebration participation despite extreme time constraints.
Three-Dot Accent: Three strategic dots placed artistically creates minimal contemporary design. This extreme minimalism takes 1 minute applying while maintaining sophisticated aesthetic.
Fingertip Dots Only: Small dot on each fingertip applies in 3 minutes total. This subtle approach suits last-minute applications or ultra-conservative requirements.
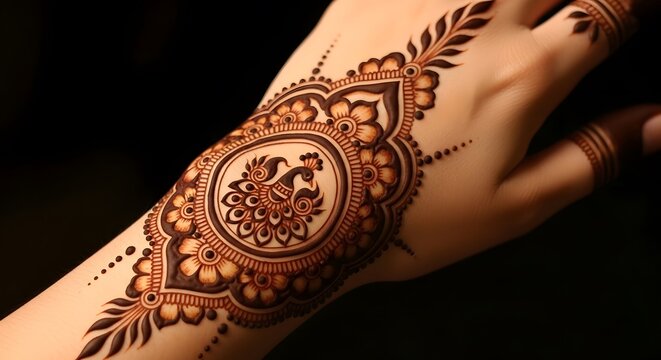
Dot Mandala Patterns
Dot mehndi design creating circular medallion effects using concentric dot rings.
Simple Circle Mandala: Concentric dot rings expanding outward from center creates basic mandala. Start tiny center dot, surround with small dot ring, continue expanding with progressively larger dots creating stunning dimensional effect.
Petal Mandala Dots: Dots arranged in petal formations radiating from center creates floral mandala. This botanical interpretation combines mandala structure with flower aesthetics beautifully.
Geometric Mandala: Dots arranged in geometric patterns triangles, squares, diamonds within circular mandala framework creates architectural precision. This contemporary fusion appeals to modern aesthetic sensibilities.
Layered Mandala: Multiple mandala rings with varying dot sizes and spacing creates complex layered effect. This sophisticated approach demonstrates dot technique’s surprising artistic potential.
Dot Chain Patterns
Dot mehndi design creating connected visual flow through strategic placement.
Flowing Dot Trail: Dots arranged in gentle curves across hand creates flowing aesthetic. Vary dot sizes along trail graduating large to small or vice versa creating directional movement illusion.
Dot Vine Effect: Dots arranged suggesting vine growth with occasional clusters representing leaves. This botanical interpretation uses only dots proving nature-inspired beauty through simple technique.
Connected Dot Clusters: Small dot groups connected through strategic placement creates organic design flow. This scattered approach suits contemporary asymmetric aesthetic preferences.
Dot Cascade: Dots flowing from wrist toward fingers creates cascading effect. This directional design photographs dramatically creating visual interest through simple placement.
Step By Step Dot Application
Complete tutorial creating beautiful dot mehndi design systematically.
Step 1 – Cone Preparation: Test cone flow on paper ensuring consistent paste release. Proper flow prevents frustrating application interruptions mid-design.
Step 2 – Design Planning: Visualize complete dot pattern before beginning. This planning prevents random placement appearing unintentional rather than artistically deliberate.
Step 3 – Start Center: Begin central position working outward systematically. This methodical approach ensures balanced proportional composition.
Step 4 – Maintain Consistency: Keep pressure consistent producing uniform dot sizes. This consistency separates professional appearance from amateur attempts.
Step 5 – Allow Drying: Let each dot dry slightly before adding nearby dots preventing accidental smudging. This patience ensures clean crisp results.
Step 6 – Complete Pattern: Finish entire design before evaluating overall effect. Partial completion often appears incomplete misleading aesthetic judgment.
Common Dot Mistakes
Avoiding predictable errors ensuring beautiful dot mehndi design results.
Mistake #1: Angled Pressure Problem: Oval dots rather than perfect circles Solution: Maintain perpendicular cone angle
Mistake #2: Prolonged Pressure Problem: Paste spreading creating blobs Solution: Quick pressure release
Mistake #3: Random Placement Problem: Chaotic appearance lacking intention Solution: Plan pattern before beginning
Mistake #4: Inconsistent Sizing Problem: Varying dot sizes appearing uncontrolled Solution: Practice pressure control consistency
Dot Aftercare
Achieving darkest stain while maintaining dot precision through proper care.
Standard henna aftercare applies keep paste on 6-8 hours, avoid water 12 hours after removal, apply natural oils daily. Dot designs often stain slightly darker than line work because complete oxidation occurs without paste smearing during drying.
Dot precision remains visible throughout entire stain lifecycle unlike lines potentially blurring. This crisp aesthetic maintains pattern clarity from initial dark stain through final fading.
Conclusion
Dot mehndi design in 2026 democratizes henna artistry by eliminating intimidating technical barriers enabling everyone achieving beautiful results regardless of artistic ability or experience level.
This revolutionary approach proves that genuine beauty emerges from simple accessible techniques rather than complex elaborate skills requiring extensive training.
The wisdom of dot technique lies in understanding that artistic impact emerges from thoughtful placement and consistent execution rather than technical virtuosity.
When mehndi honors accessibility principles, it transforms from exclusive artistic practice into inclusive cultural celebration welcoming all participants joyfully.
Explore all 50+ dot mehndi designs now and discover the easiest henna technique delivering guaranteed beautiful results your very first attempt using only simple dots! ✨🎨
FAQS
Q: What is dot mehndi design?
A: Dot mehndi design uses exclusively circular dots rather than lines creating beautiful patterns through strategic dot placement. This technique requires only perpendicular cone pressure eliminating line-drawing skills completely.
Q: Can absolute beginners create dot mehndi?
A: Yes! Dot mehndi design represents easiest possible henna technique because dots require only simple perpendicular pressure without directional control or steady hand requirements. Perfect for first-timers.
Q: Do dot designs look as good as line designs?
A: Absolutely! Dot mehndi design creates stunning sophisticated patterns rivaling traditional line work. Strategic placement and size variation produce beautiful results proving artistic impact through simple technique.
Q: How long does dot mehndi take?
A: Dot mehndi design applies extremely quickly. Simple patterns take 5-10 minutes, moderate designs require 15-20 minutes significantly faster than line work requiring 30-45 minutes minimum.
Q: Can kids do dot mehndi themselves?
A: Yes! Dot technique perfectly suits children because quick individual applications accommodate short attention spans while simple pressure eliminates frustrating line control requirements.
Q: Does dot mehndi stain darker?
A: Dot mehndi design often stains slightly darker than line work because complete oxidation occurs without smearing during drying. Crisp dot edges maintain definition throughout stain lifecycle.
Q: What’s easiest dot pattern for beginners?
A: Simple wrist dot bracelet represents easiest pattern evenly-spaced dots around wrist applying in 5 minutes producing elegant results perfect for absolute first attempt.
Q: Can I create complex designs using only dots?
A: Absolutely! Mandalas, geometric patterns, florals, and elaborate compositions create stunning complexity using exclusively dot technique. Strategic placement and size variation produce sophisticated results.
Q: Is dot mehndi appropriate for weddings?
A: Yes! Contemporary brides increasingly choose minimalist dot designs demonstrating sophisticated restraint. Dot patterns photograph beautifully while applying quickly suiting busy wedding preparation schedules.
Q: How do I make dots perfectly round?
A: Maintain perpendicular cone angle to skin and apply straight downward pressure with quick release. This technique produces perfect circles every time regardless of hand steadiness.