
Introduction
Beginner Cute Simple Mehndi Designs for Front Hands 2026 are the most searched, most loved, and most needed henna designs in Pakistan and India in 2026.
Every woman, whether she is a complete beginner touching a henna cone for the very first time, a young girl preparing for Eid, or a bride who wants something elegant without spending hours at the salon, is searching for exactly this: designs that are cute, simple, easy to draw, and perfect for the front hand.
This complete, expert guide gives you 80+ of the most beautiful Beginner Cute Simple Mehndi Designs for Front Hands 2026. Each design is carefully selected to be genuinely easy for beginners, genuinely cute in appearance, and genuinely beautiful on the front-hand canvas.
You will also find a complete step-by-step guide, a skill-level breakdown, design ideas for every occasion, expert color tips, a beginner practice plan, and the most commonly asked questions,, all in one place.
- ⭐ What Makes This Guide Different? Unlike other sites that mix beginner designs with complex patterns, every single design in this guide is truly beginner-friendly AND cute AND specifically chosen for the front hand. No confusion, no complexity, just 80+ beautiful designs you can actually draw today!
What is Front Hand Mehndi and Why is it Perfect for Beginners?
Front hand mehndi refers to henna designs applied on the palm side of the hand, the inner surface that faces forward when you hold your hands up. This is different from backhand mehndi, which is applied on the top of the hand.
The front hand, or palm, has been the most traditional canvas for mehndi art across Pakistan, India, and South Asia for centuries because it is the most expressive and most visible hand surface in everyday life.
Front hand mehndi is particularly perfect for beginners for three powerful reasons. First, the palm is a flat, stable surface that is easier to draw on than the curved back of the hand.
Second, the front hand allows you to rest it comfortably in your lap or on a flat surface, while applying, making self-application much easier than back-hand designs.
Third, and most importantly, front-hand designs tend to use the natural lines and curves of the palm as design guides, meaning the hand itself helps beginners create beautiful compositions naturally.
The Front Hand Canvas: What Makes it Special
- Flat, stable surface, easiest hand canvas for beginners to draw on
- Natural palm lines guide design placement; the hand tells you where elements belong
- Comfortable self-application position, rest your hand flat on the table or in your lap
- Most traditional mehndi canvas has centuries of design heritage to draw from
- Highly visible and photogenic, every greeting and photo shows the front hand beautifully
- Suits both minimal and full-coverage designs, scales from 10 minutes to 90 minutes
In 2026, Beginner Cute Simple Mehndi Designs for Front Hands 2026 have become the dominant henna category on social media in Pakistan and India because young women and girls want designs that look genuinely beautiful and cute without requiring professional skill or hours of practice.
The modern approach to front hand mehndi celebrates simplicity as a sophisticated design choice, not a limitation.
3 Skill Levels of Beginner Cute Simple Mehndi Designs for Front Hands
Not all beginners are at the same level. This guide organizes all 80+Beginner Cute Simple Mehndi Designs for Front Hands 2026 into three clear levels so you can start exactly where you are and build confidence naturally:
| Level | Who it’s for | Design complexity | Time required | # of elements |
|---|---|---|---|---|
| Level 1 Absolute Beginner |
First-time henna users, kids | 1 to 2 elements only | 8 to 15 min | 1 to 2 |
| Level 2 Easy Beginner |
Some basic practice done | 3 to 4 elements | 15 to 30 min | 3 to 5 |
| Level 3 Confident Beginner |
Can draw basic shapes well | 4 to 6 elements | 30 to 50 min | 5 to 8 |
Types of Beginner Cute Simple Mehndi Designs for Front Hands 2026
Cute Floral Front Hand Mehndi Most Loved
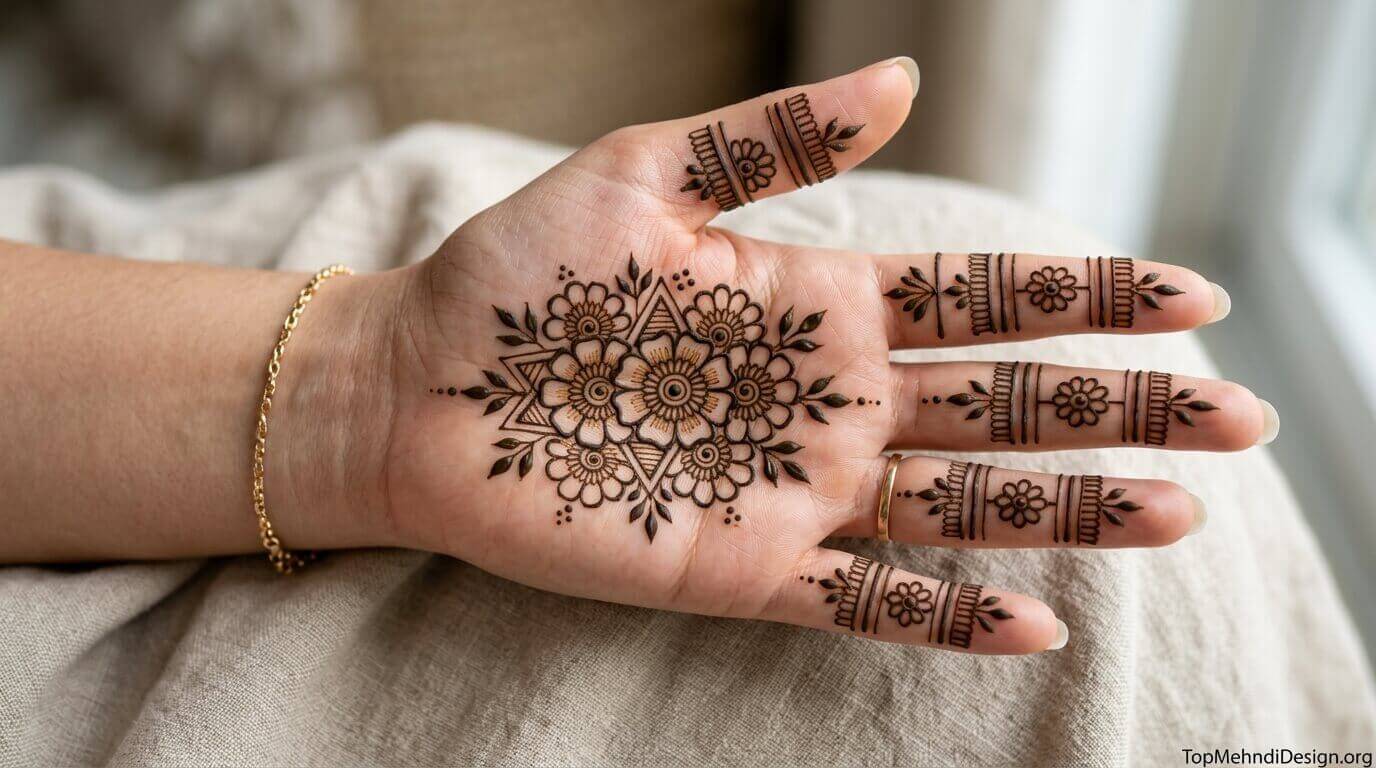
Cute floral designs are the most popular category of Beginner Cute Simple Mehndi Designs for Front Hands 2026 in 2026.
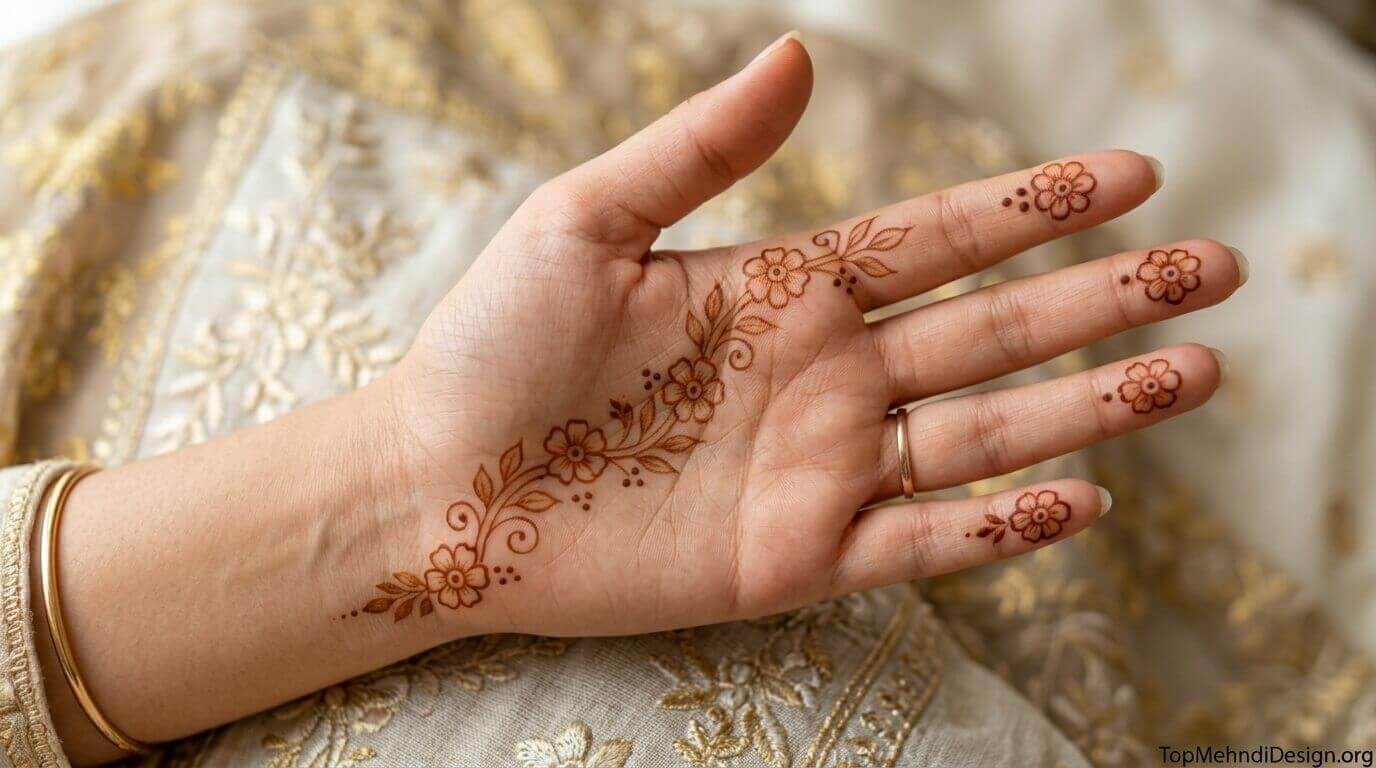
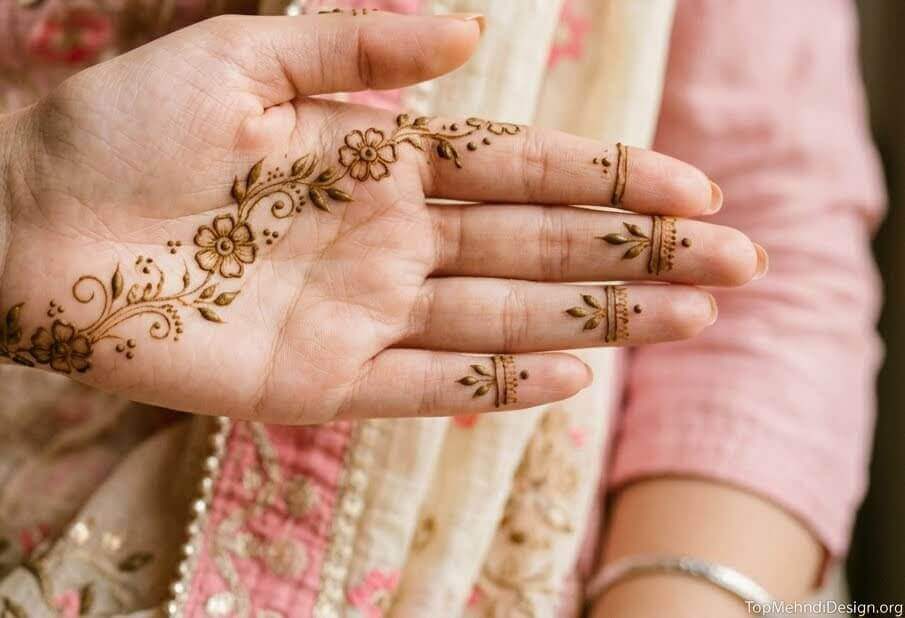
Small flowers, roses, daisies, lotuses, and simple 5-petal blooms placed on the palm create an instantly beautiful and feminine look.
The cuteness comes from the petite scale of the flowers: small blooms arranged on the palm look charming, while larger Arabic florals create a more dramatic effect.
Beginners love floral designs because petals are simply teardrop shapes arranged in a circle, the most forgiving shape in mehndi art.
Cute Geometric Front Hand Mehndi Modern and Trending
Geometric front hand designs using circles, triangles, diamonds, and dot patterns create a modern, contemporary, cute look that is enormously popular among young women and college students in 2026.
Geometric shapes are actually easier for beginners than organic floral shapes because straight lines and symmetrical forms are more predictable to draw.
A simple diamond at the palm center with dot accents creates a strikingly cute front hand design in under 15 minutes.
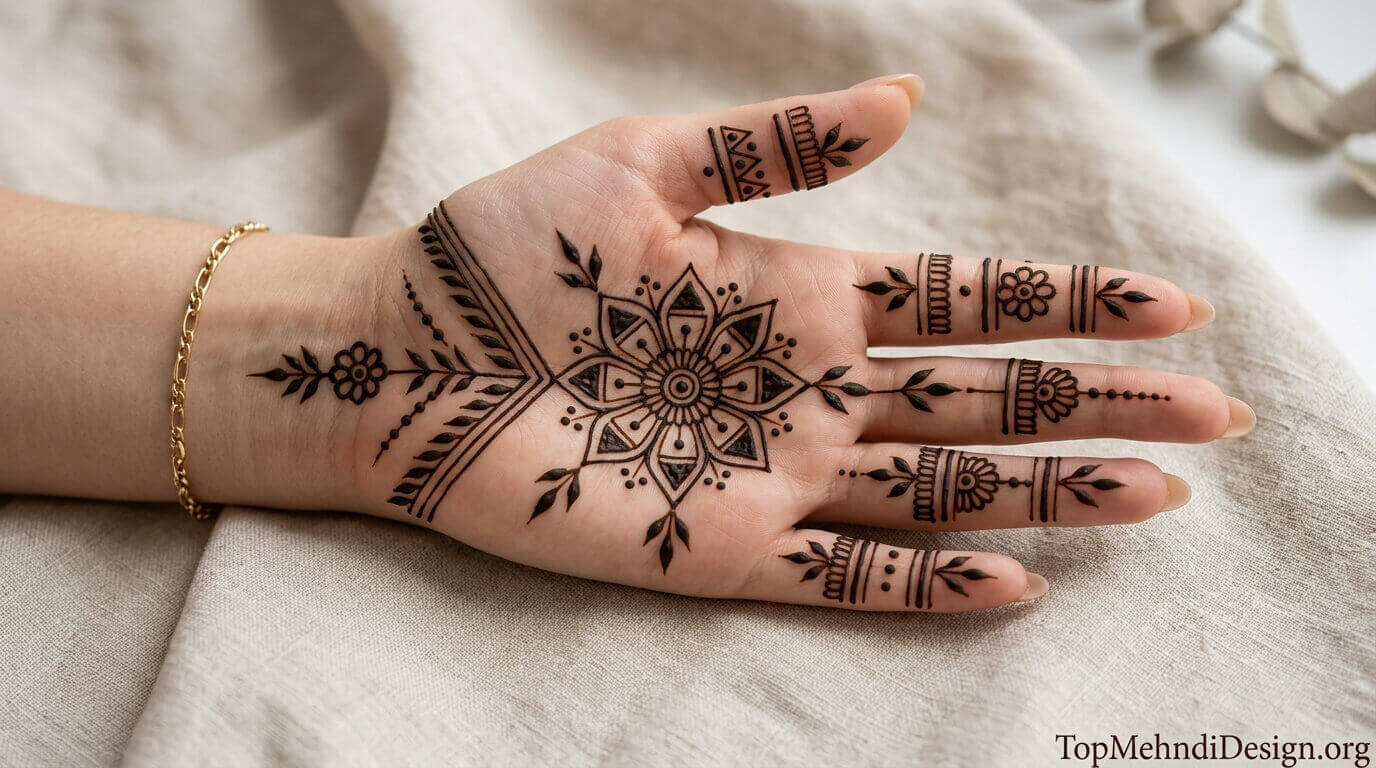
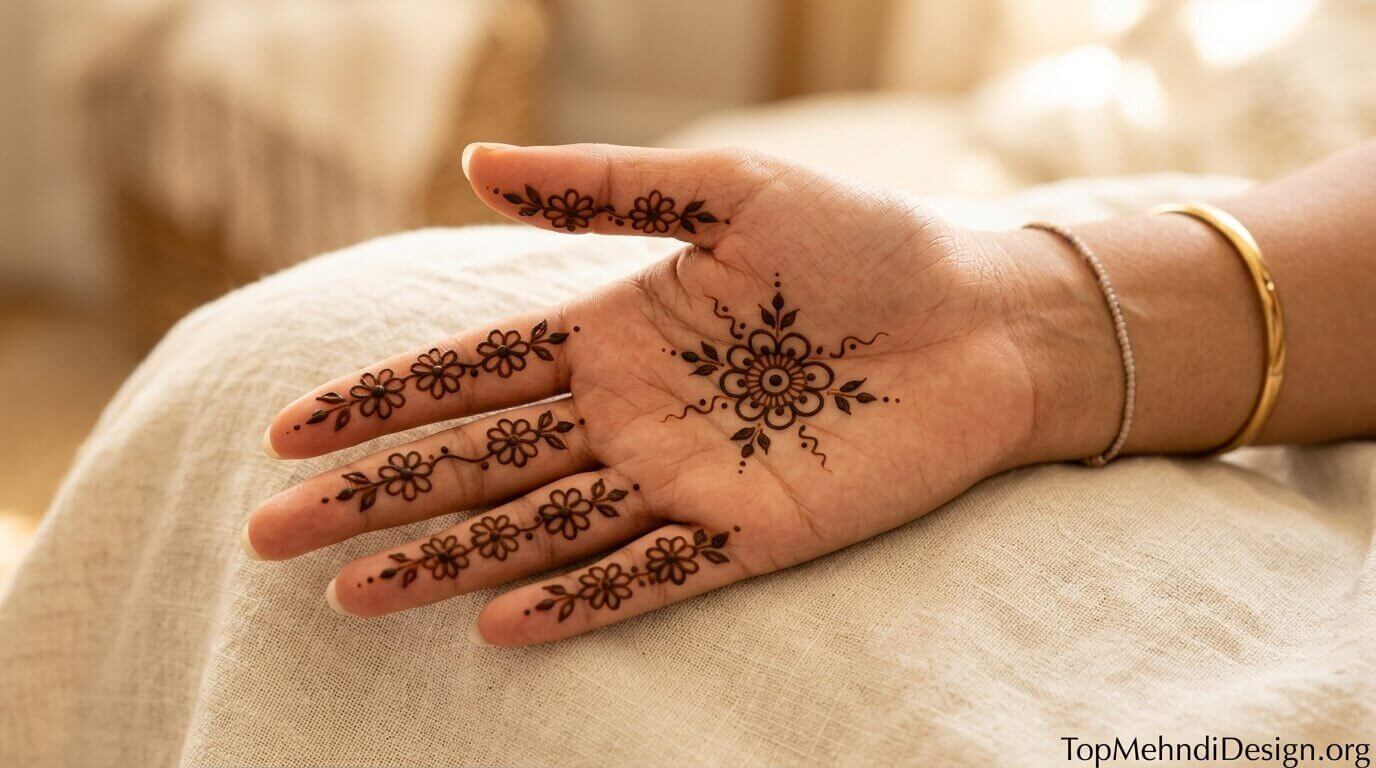
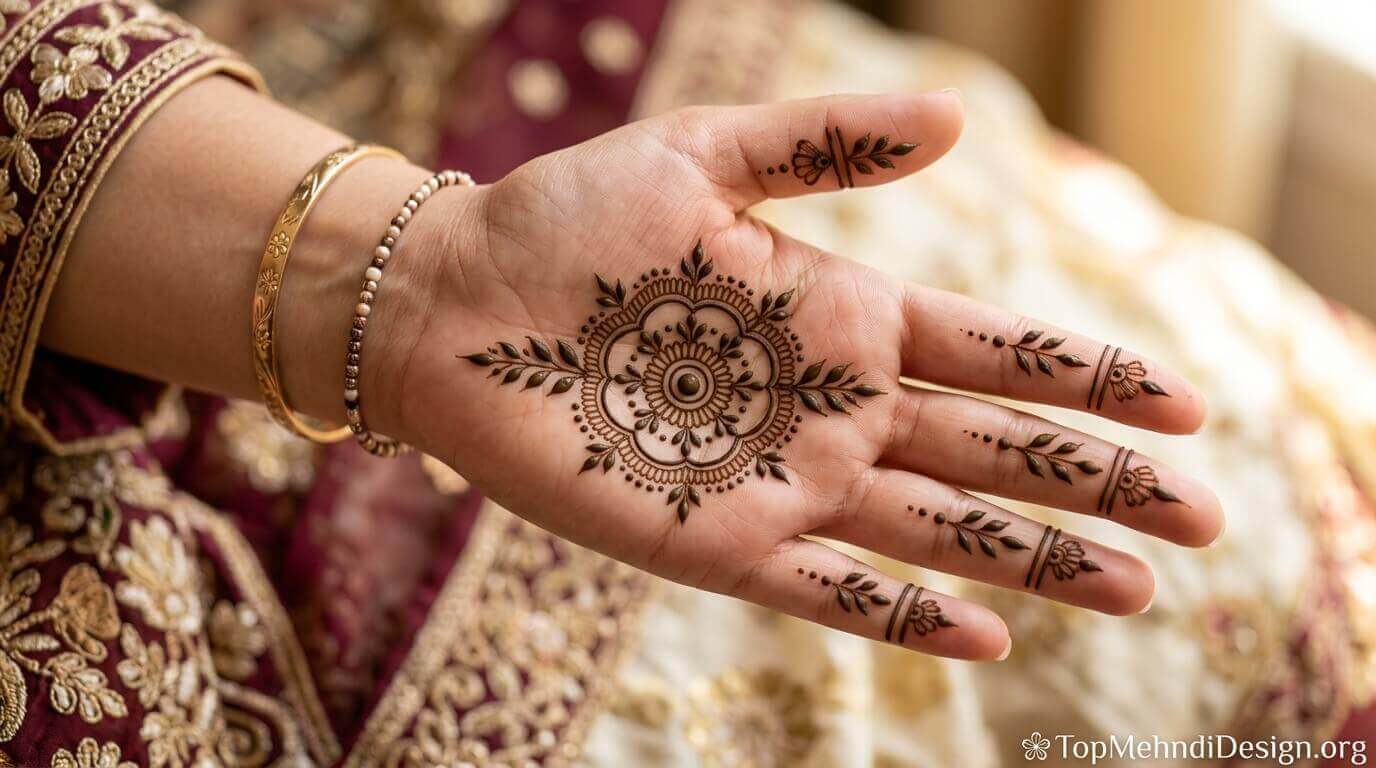
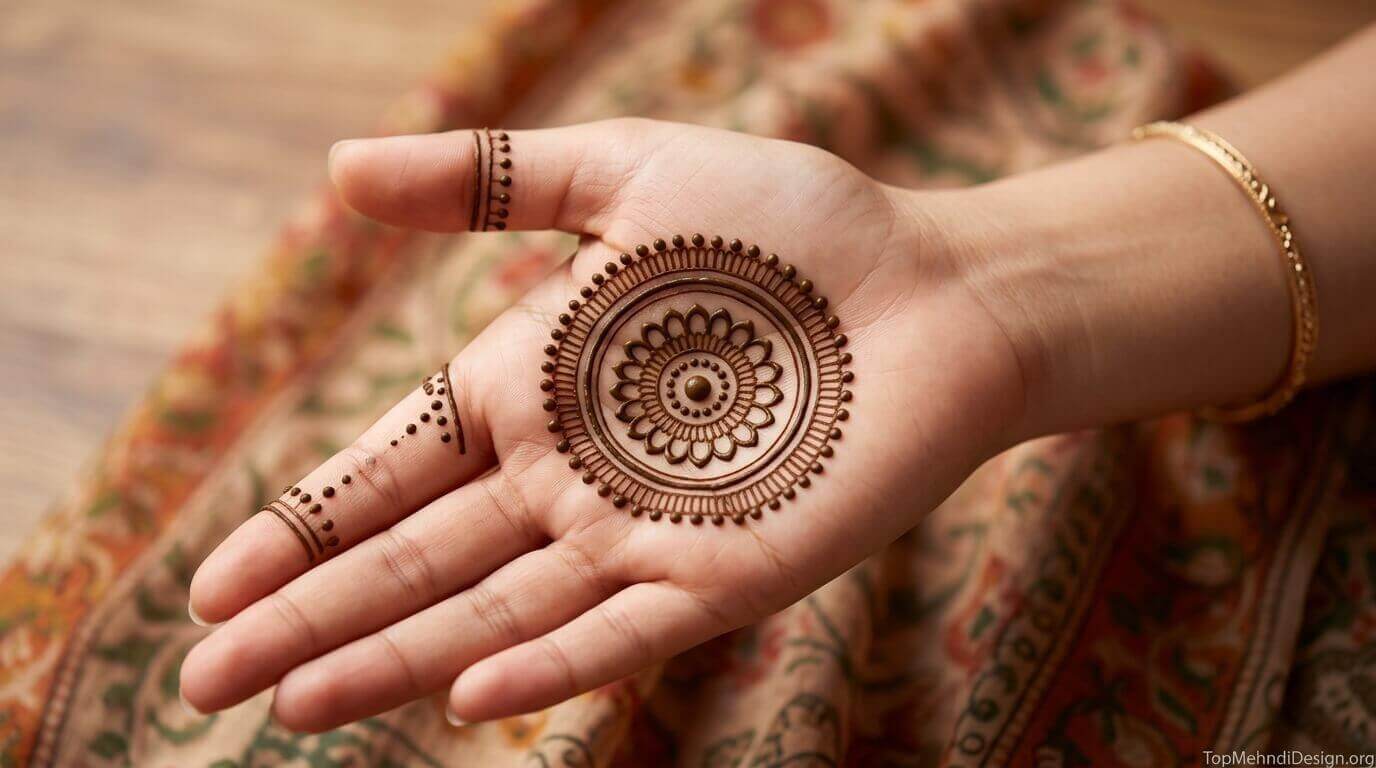
Cute Mandala Front Hand Mehndi Classic and Photogenic
A small mandala placed at the center of the palm is one of the most beautiful and most photogenic Beginner Cute Simple Mehndi Designs for Front Hands 2026.
The mandala’s circular symmetry means that even small imperfections are barely noticeable because the eye follows the overall circular composition rather than individual strokes.
A 4-petal or 6-petal mandala at the palm center looks complete and professional even when drawn by a complete beginner on their very first attempt.
Cute Finger Tip Mehndi Quick and Adorable
Applying simple, cute designs only on the fingertips, such as small flowers, geometric bands, dot rings, or simple fills, creates a charming front-hand look without drawing anything on the palm.
This approach is perfect for absolute beginners who are not yet confident drawing larger elements. Fingertip mehndi looks adorable in close-up photos and takes only 10 minutes for all five fingers.
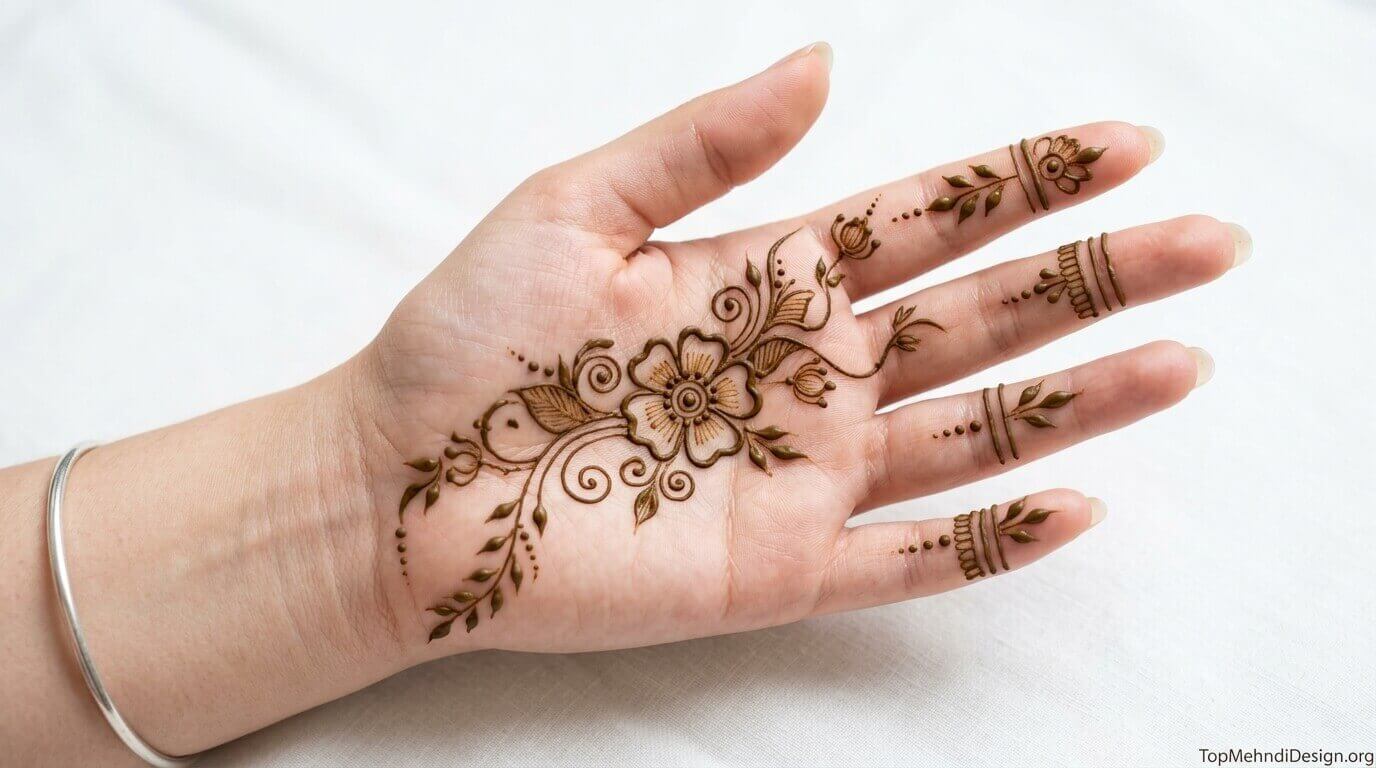
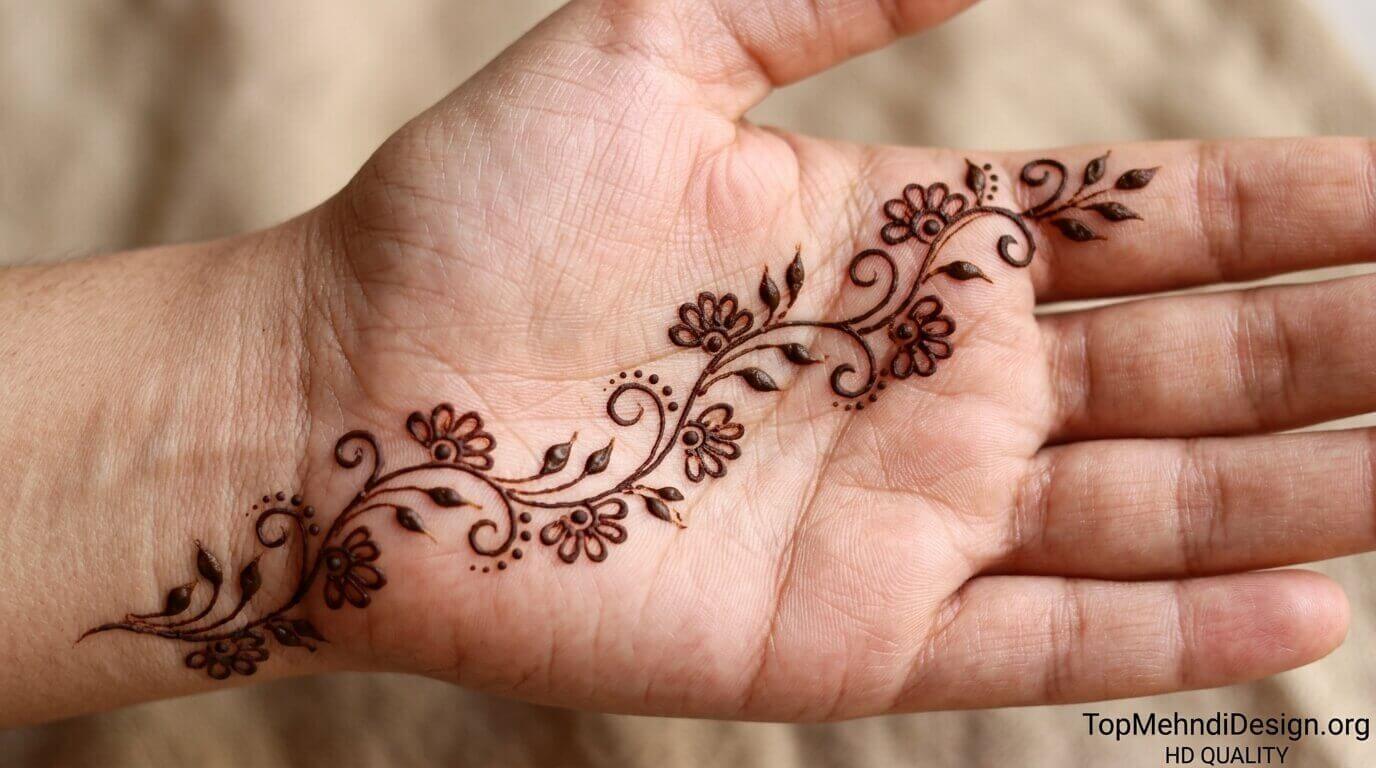
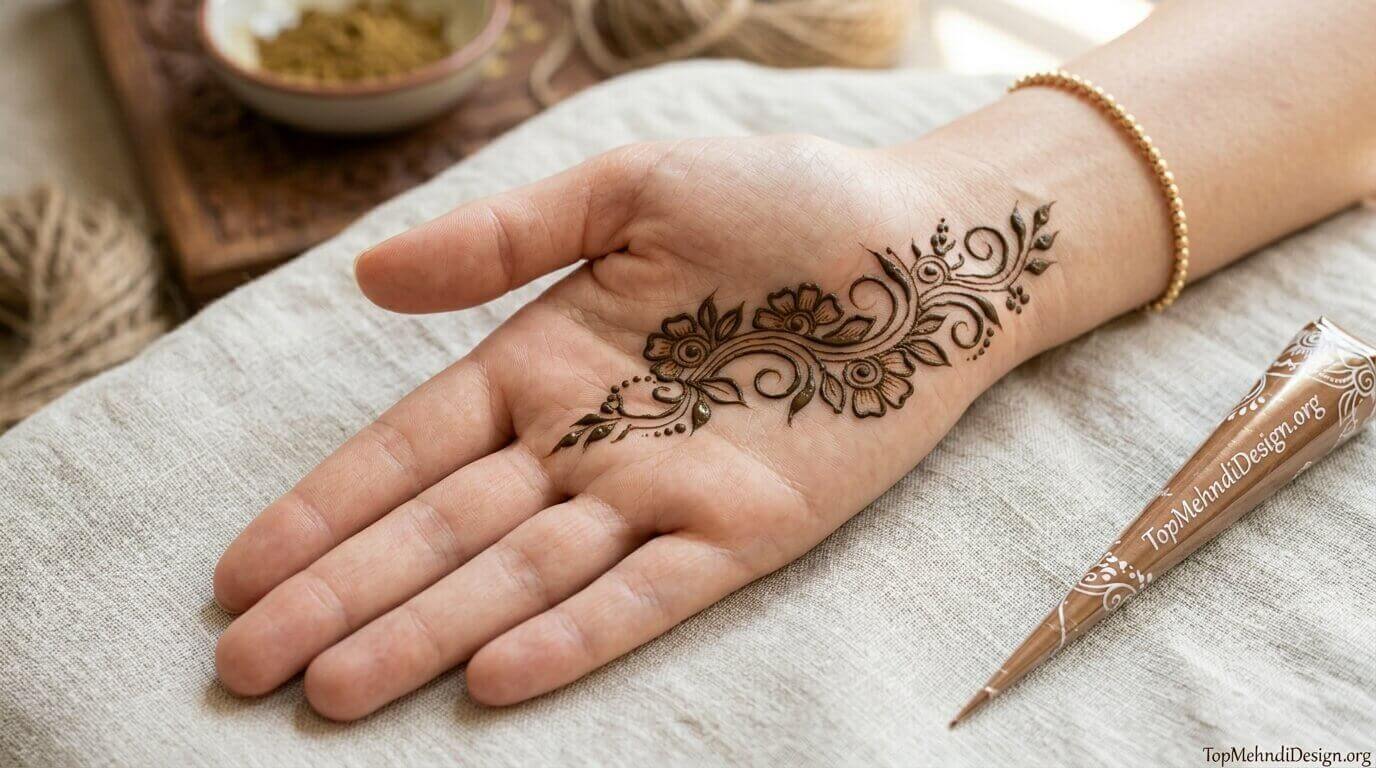
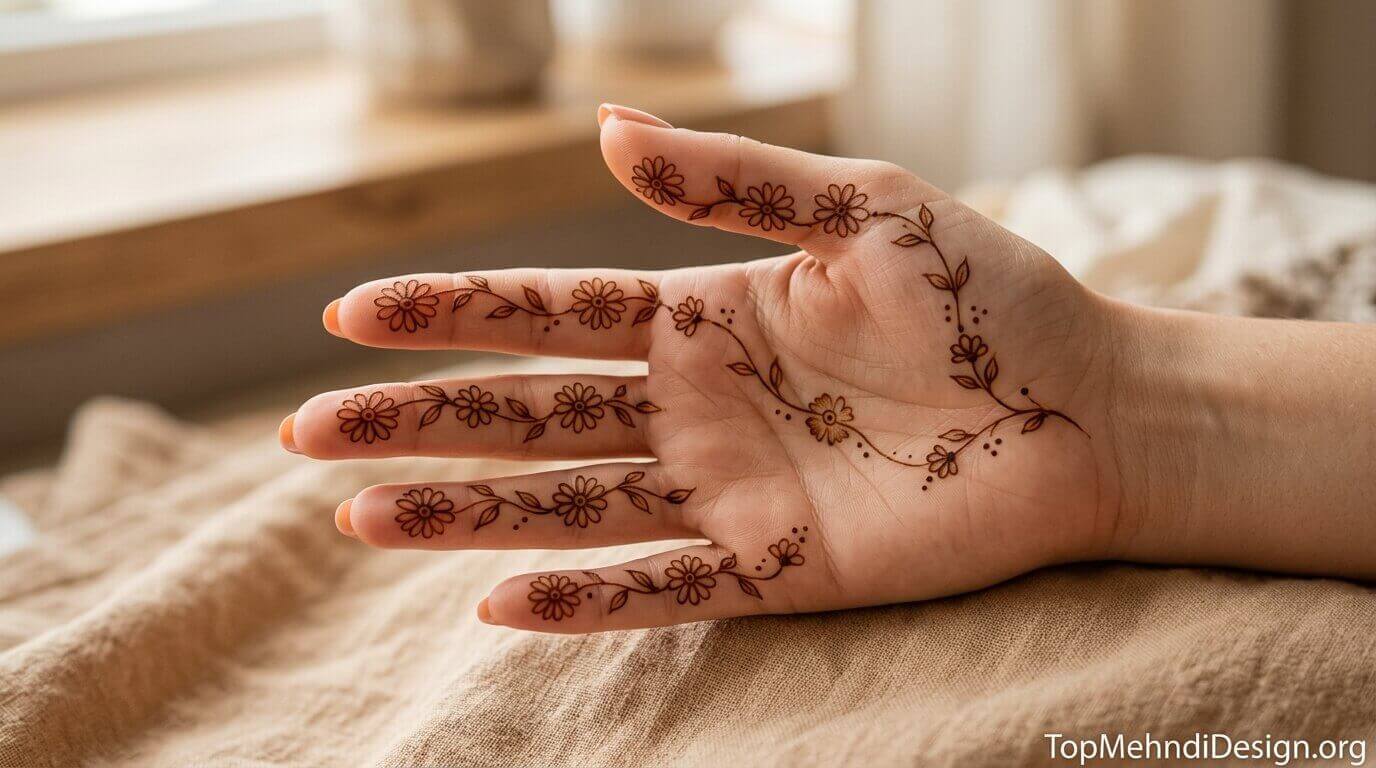
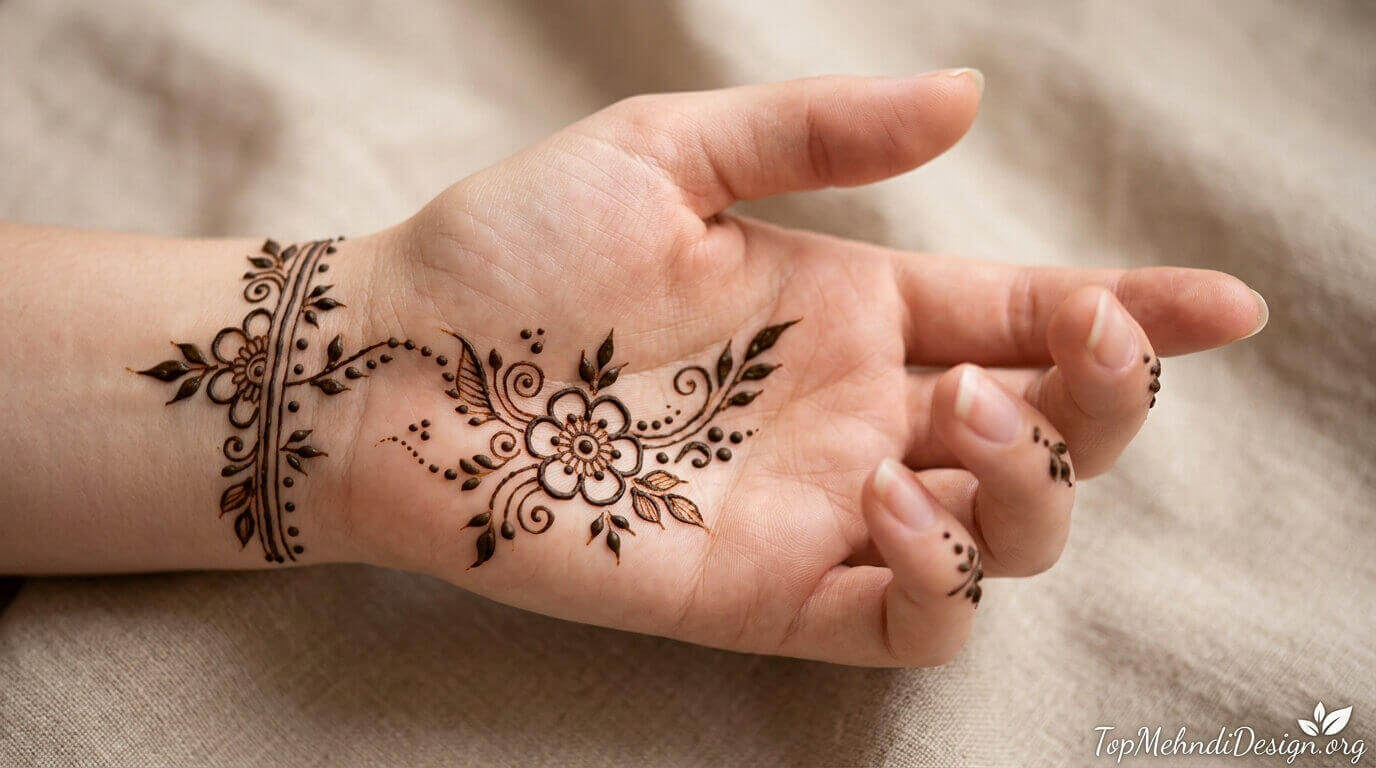
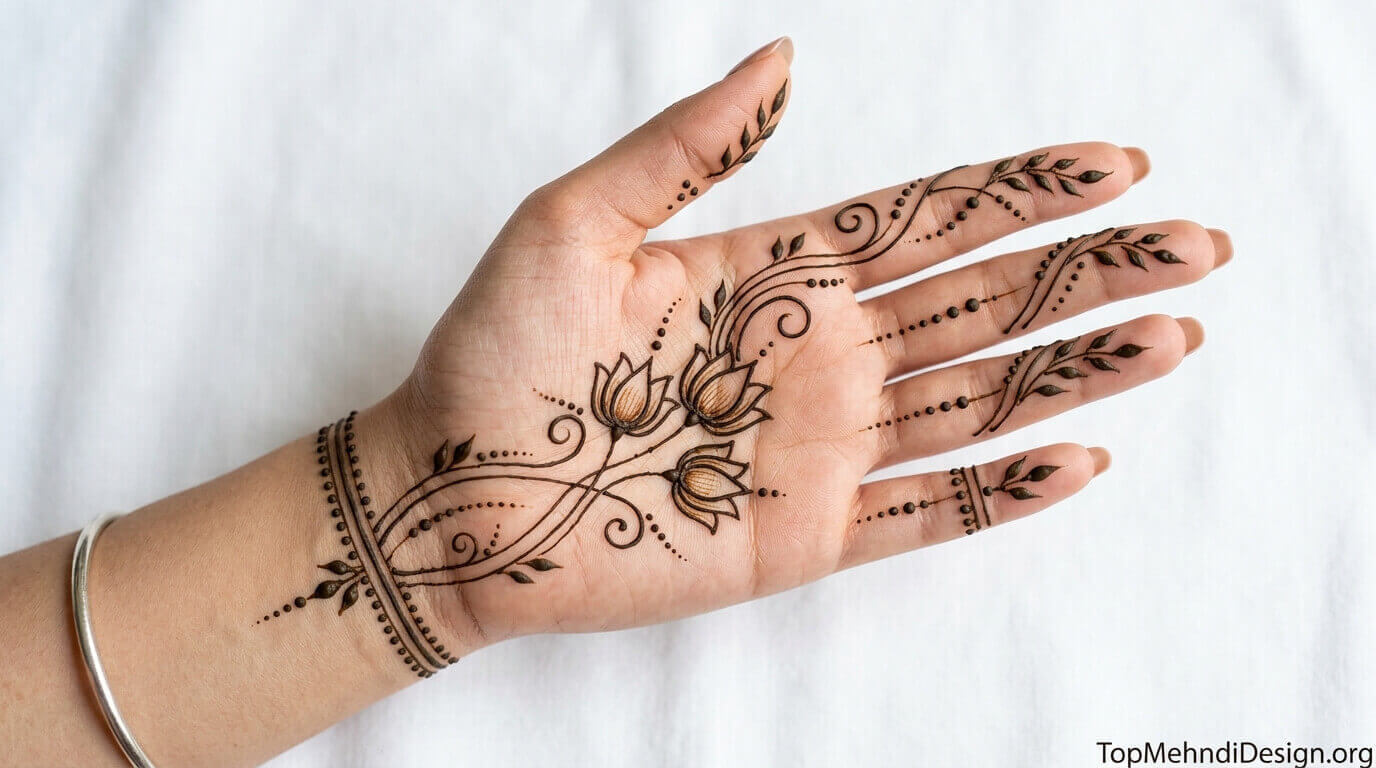
Cute Vine and Leaf Front Hand Mehndi Natural and Elegant
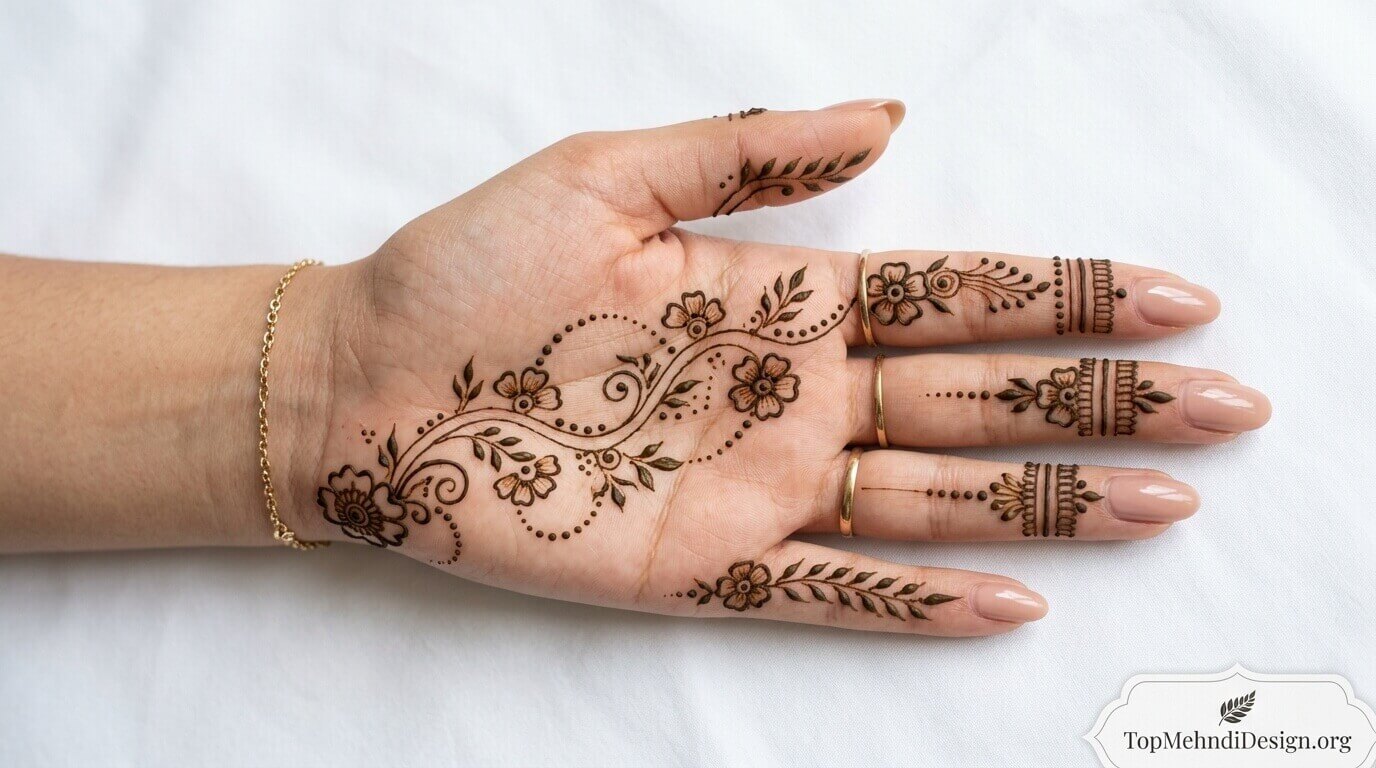
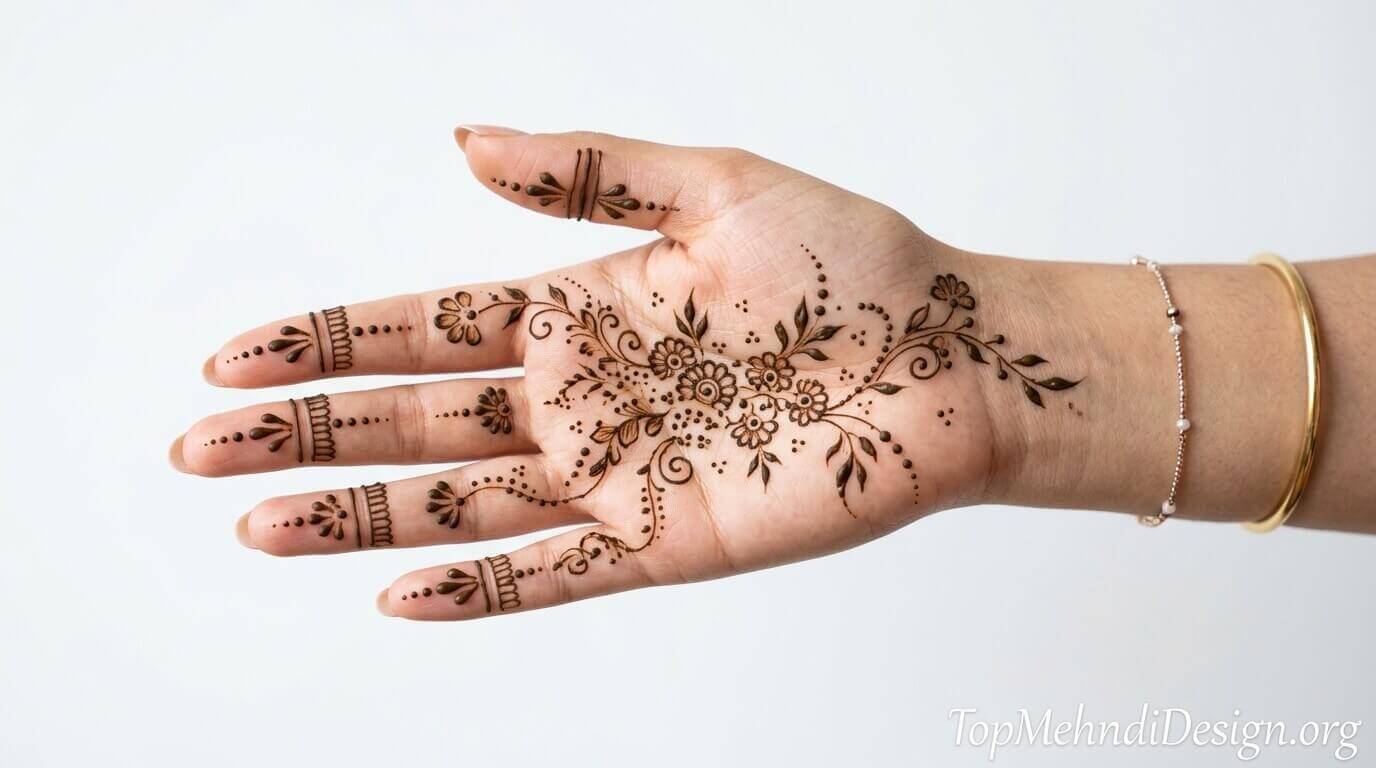
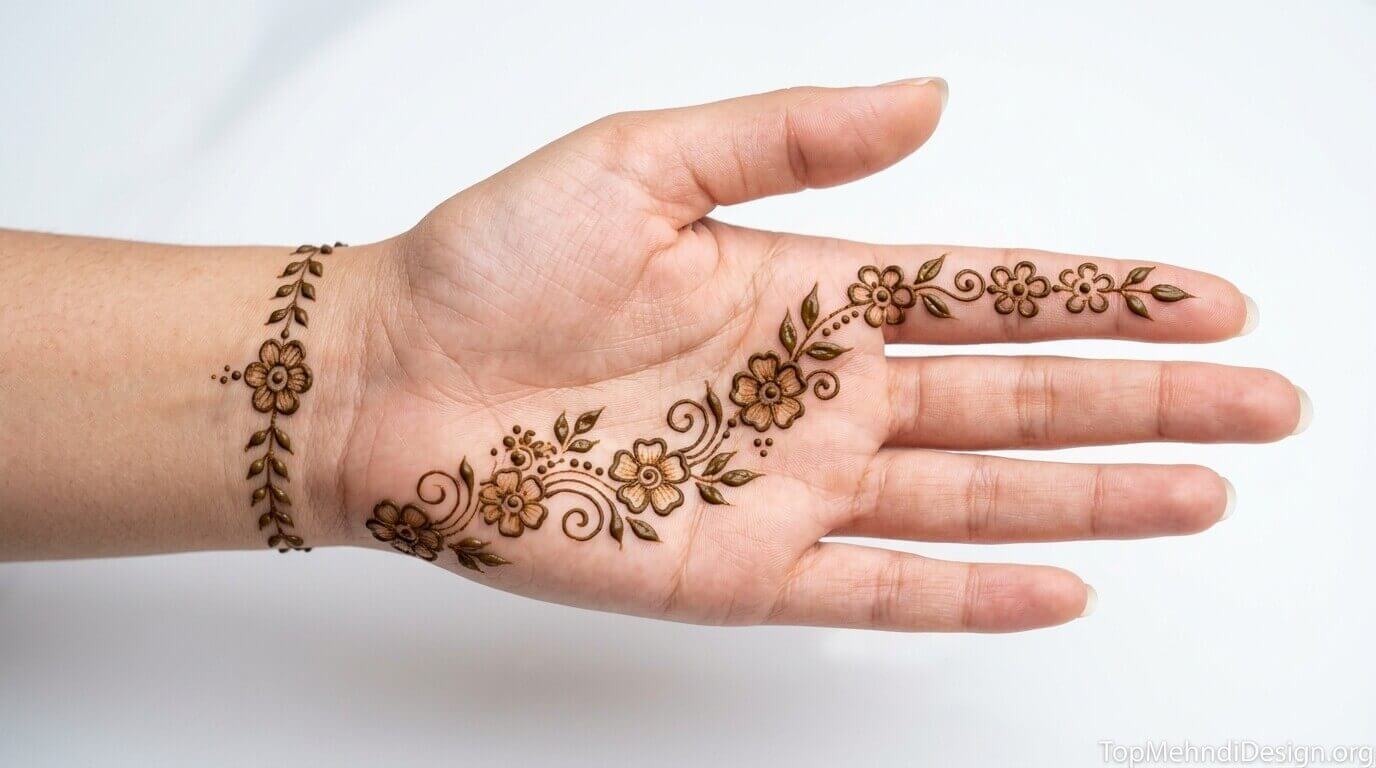
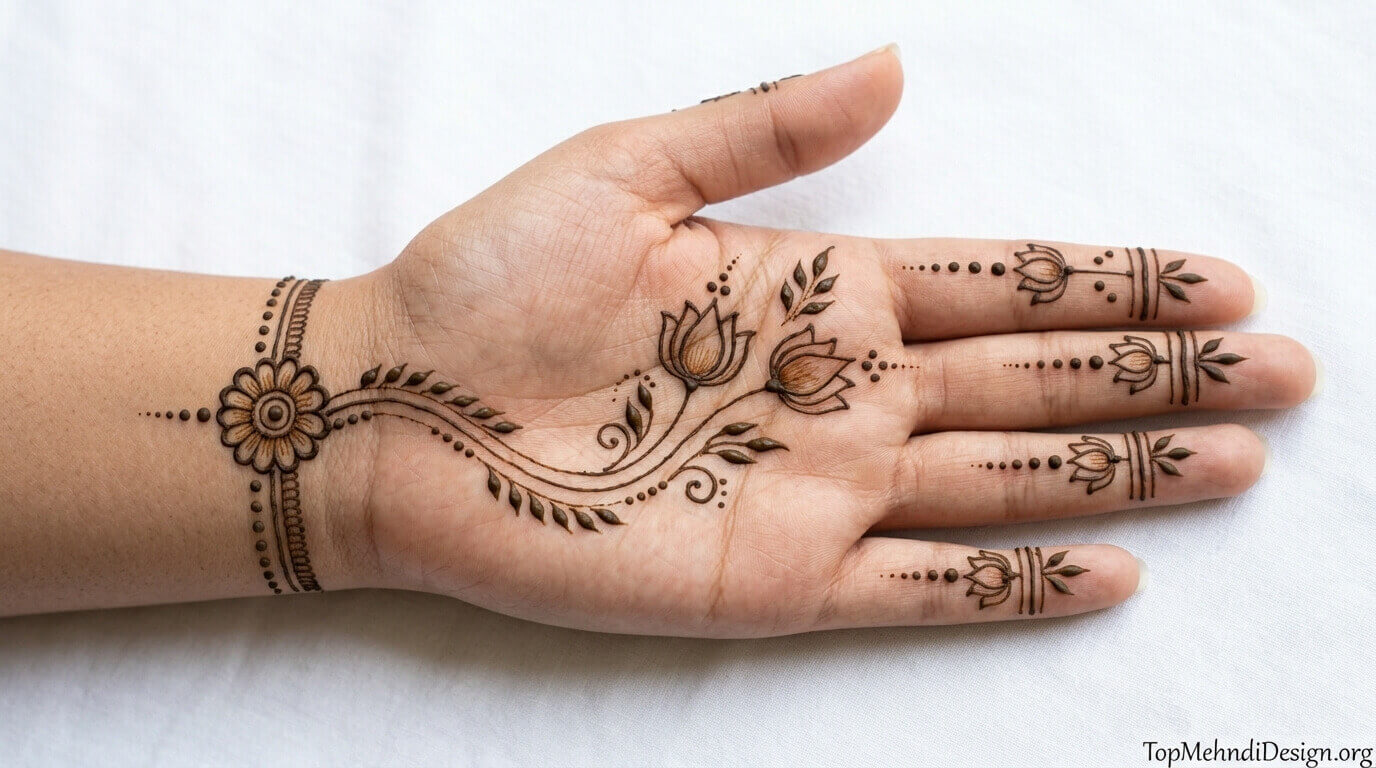
A simple vine with small leaves flowing from the wrist across the palm toward the fingers creates one of the most naturally beautiful Beginner Cute Simple Mehndi Designs for Front Hands 2026.
The vine follows the natural flow of the hand, making it easy to draw confidently. Adding tiny flowers along the vine creates the popular floral vine style, the most widely saved front-hand design on Pinterest in Pakistan in 2026.
Cute Arabic Style Front Hand Mehndi Bold and Beautiful
Arabic-style front hand mehndi uses bold, confident strokes, large motifs, and generous negative space to create a dramatic look that applies very quickly.
Arabic designs are actually perfect for beginners because they forgive imprecision. The bold style makes minor variations in line thickness look intentional and artistic.
A single large Arabic leaf or flower drawn diagonally across the palm creates an instantly beautiful, cute front-hand design.
Cute Minimal Front Hand Mehndi Modern and Chic
Minimal front hand designs feature just one or two small elements, a single flower, a tiny mandala, or a simple dot composition placed thoughtfully on the palm with generous space around them.
This approach is the biggest trend in 2026 among urban working women who want elegant mehndi that looks modern and chic rather than traditional.
The minimal style is actually the easiest for beginners because fewer elements mean less drawing and less opportunity for mistakes.
80+ Beginner Cute Simple Mehndi Designs for Front Hands Complete List 2026
⭐ Level 1: Absolute Beginner Designs (8 to 15 Minutes)
These designs require only 1 to 2 elements and are perfect for your very first mehndi attempt:
- Single small flower at palm center: 5 teardrop petals around a center dot, 8 minutes, adorably cute
- Fingertip flower fills: Small filled flowers on each fingertip only, 10 minutes total
- Palm center dot mandala: 5 dots forming a flower with a center dot, surrounded by 5 more dots, 8 minutes
- Simple wrist band: Single line with evenly spaced dot accents circling the wrist, 8 minutes
- Single rose with 3 leaves: One simple rose bloom with 3 small leaf accents, 10 minutes
- Heart on palm: One heart shape at palm center with dot border, sweet and cute, 8 minutes
- Star on palm: 5-pointed star at palm center with dot ring, bold and cute, 8 minutes
- Single leaf vine: One curved vine with 5 leaves from wrist to middle finger, 10 minutes
- Fingertip bands: Simple parallel line bands on each fingertip, 10 minutes, always neat
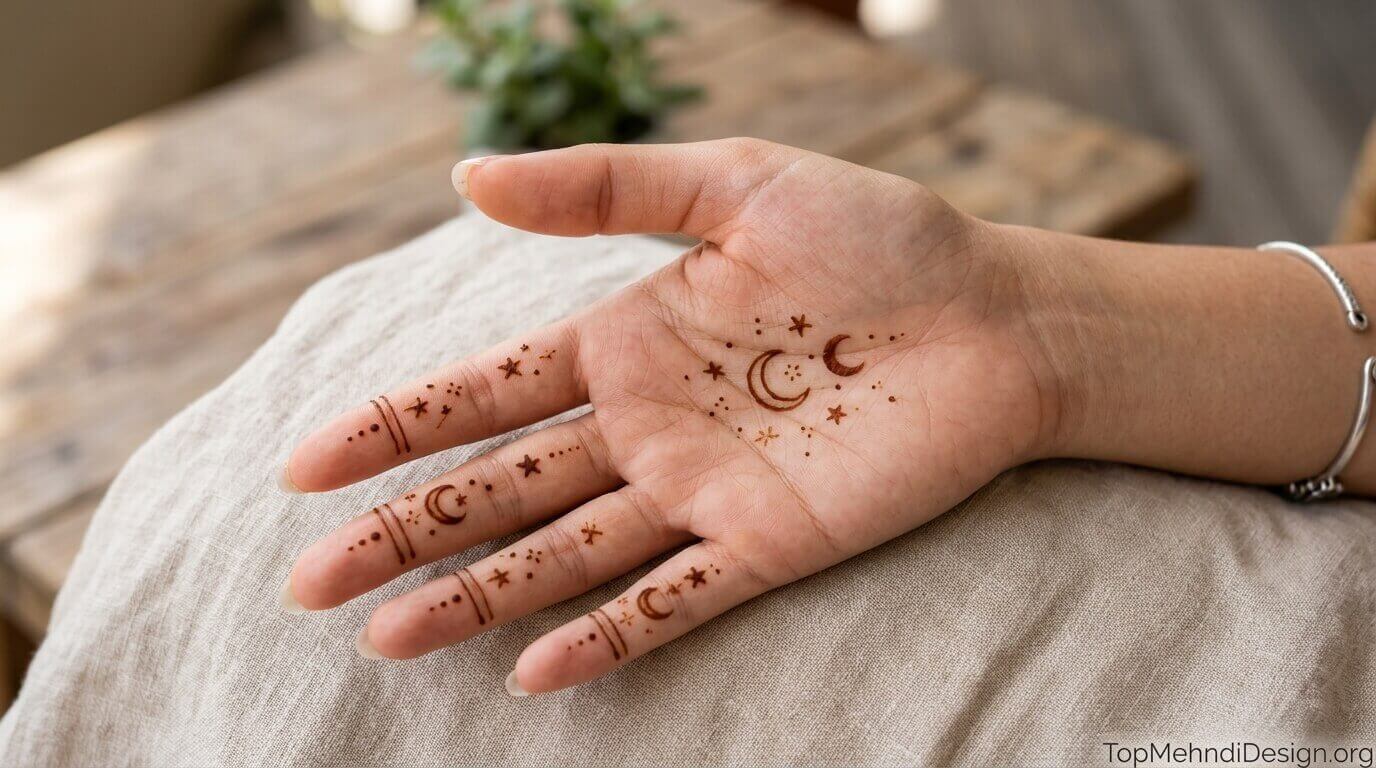
- Crescent moon on palm: Small crescent with 3 stars, minimal and meaningful, 10 minutes
- Single paisley: One large paisley motif at the palm center with a dot border, 12 minutes
- Dot flower on each finger: 5-dot flower on each finger base, 12 minutes total
⭐⭐ Level 2: Easy Beginner Designs (15 to 30 Minutes)
These designs use 3 to 5 elements and are perfect once you have practiced for a few days:
- Floral vine trail: Vine from wrist to middle finger with 3 small flowers and leaf accents
- Palm mandala with wrist band: Small mandala at palm center plus simple wrist bracelet
- Cute rose cluster: 3 small roses grouped at the palm center with leaf background
- Arabic leaf diagonal: 3 large Arabic leaves arranged diagonally across the palm with dot accents
- Lotus on palm: Simple lotus flower at the palm center with 8 petals and a dot ring
- Finger trail with palm flower: Single flower on palm with vine extending up one finger
- Geometric diamond cluster: 3 diamond shapes arranged on the palm with connecting dot trails
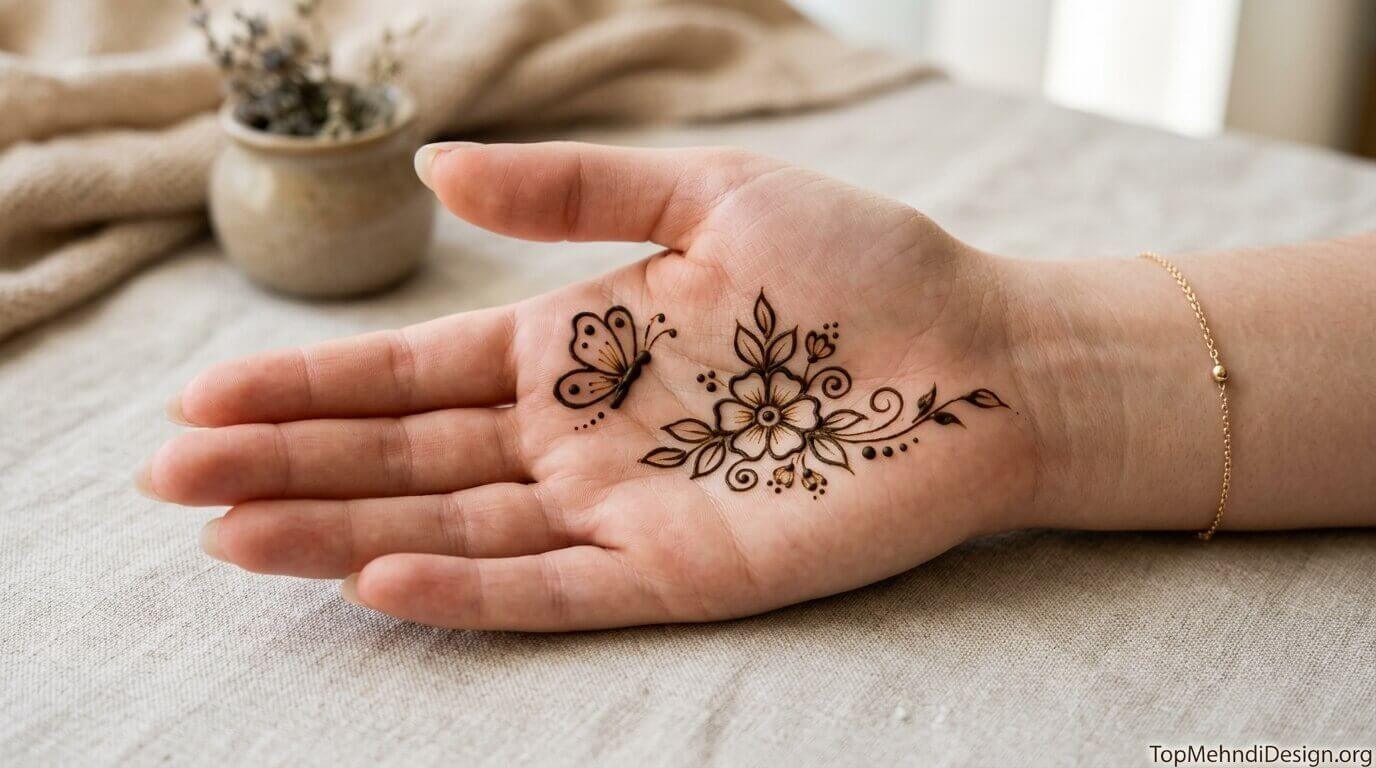
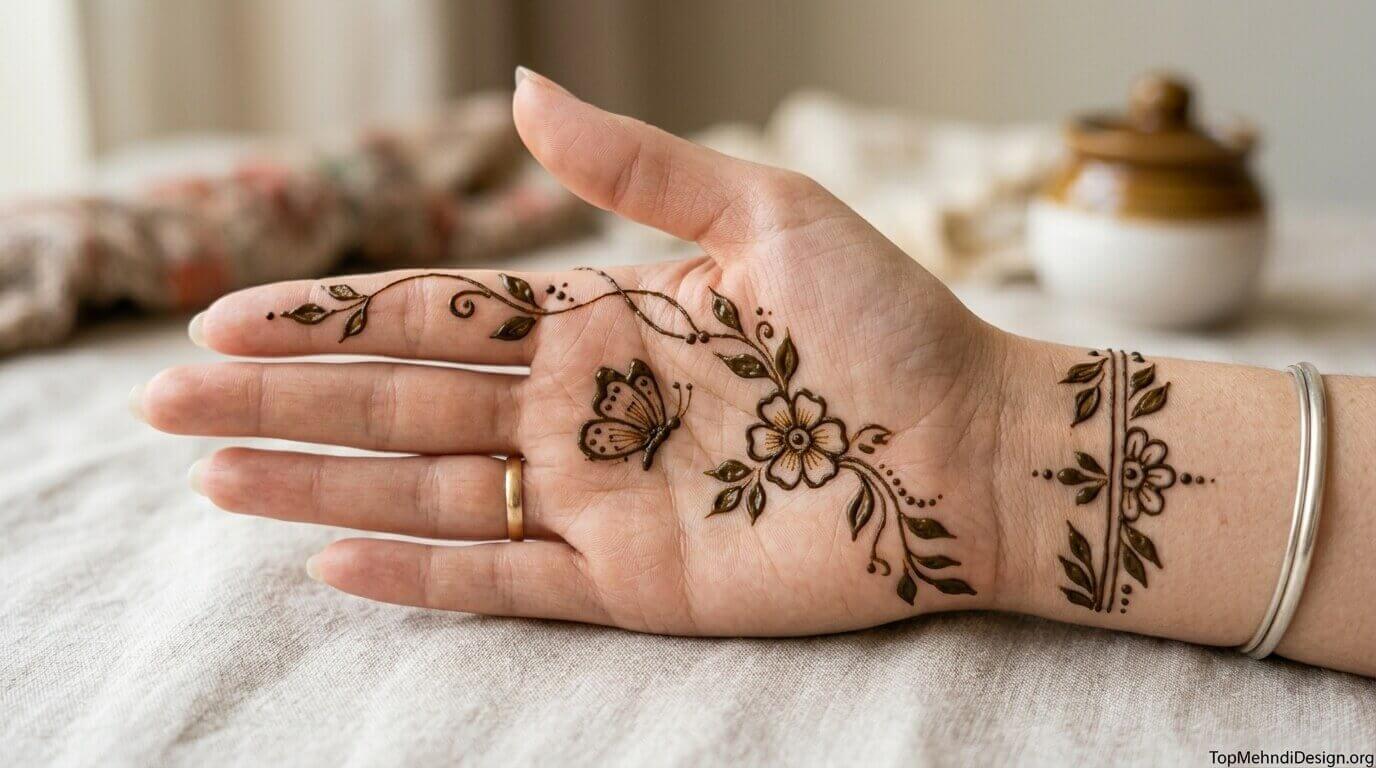
- Butterfly on palm: Simple butterfly motif at palm center, cute and unique, 20 minutes
- Floral bracelet with palm drop: Wrist flower band with a single teardrop drop onto the palm
- Peacock feather: Single peacock feather diagonal across palm, elegant and cute
- Daisy cluster on palm: 5 small daisy flowers grouped charmingly at the palm center
- Moon and floral vine: Crescent moon with floral vine extending to fingers
- Heart and rose combo: Heart at palm center surrounded by 4 small rose accents
- Geometric sun on palm: Circle with radiating lines creating a sun motif, modern and cute
- Alphabet initial: Your initial letter surrounded by dots and small flowers, personalized, cute
- Simple finger paisley set: Small paisleys on each finger in alternating directions
- Cascading dots: Flowing dot trails from wrist to each fingertip in graduated sizes
- Arabic rose with finger vine: One large Arabic rose on a palm with a vine trailing up two fingers
- Floral wrist cuff: Flower-decorated band across entire wrist, jewelry-inspired
- Palm center star with petals: 6-pointed star at palm center with petal decoration on each point
⭐⭐⭐ Level 3: Confident Beginner Designs (30 to 50 Minutes)
These designs use 5 to 8 elements and are perfect when you have built basic cone confidence:
- Full floral palm: Multiple flowers with leaves covering most of the palm with clean negative space
- Mandala with finger extensions: Palm mandala with vine trails extending up all 5 fingers
- Arabic floral with wrist band: Large Arabic floral on palm plus matching wrist bracelet
- Peacock palm design: Full peacock motif as palm centerpiece with feather tail extension
- Geometric mandala: Mandala with geometric inner pattern and petal outer ring
- Rose garden: 5 roses of different sizes arranged as a complete garden composition on a palm
- Lotus with finger designs: Central lotus with simple matching designs on each finger
- Bridal-lite floral: Full palm floral composition suitable for engagement or nikah occasion
- Butterfly with garden: Central butterfly surrounded by flowers and leaf vines
- Palm tree design: Cute palm tree motif at center, unique, playful, and adorable
- Paisley cluster with vines: 3 large paisleys connected by decorative vine trails
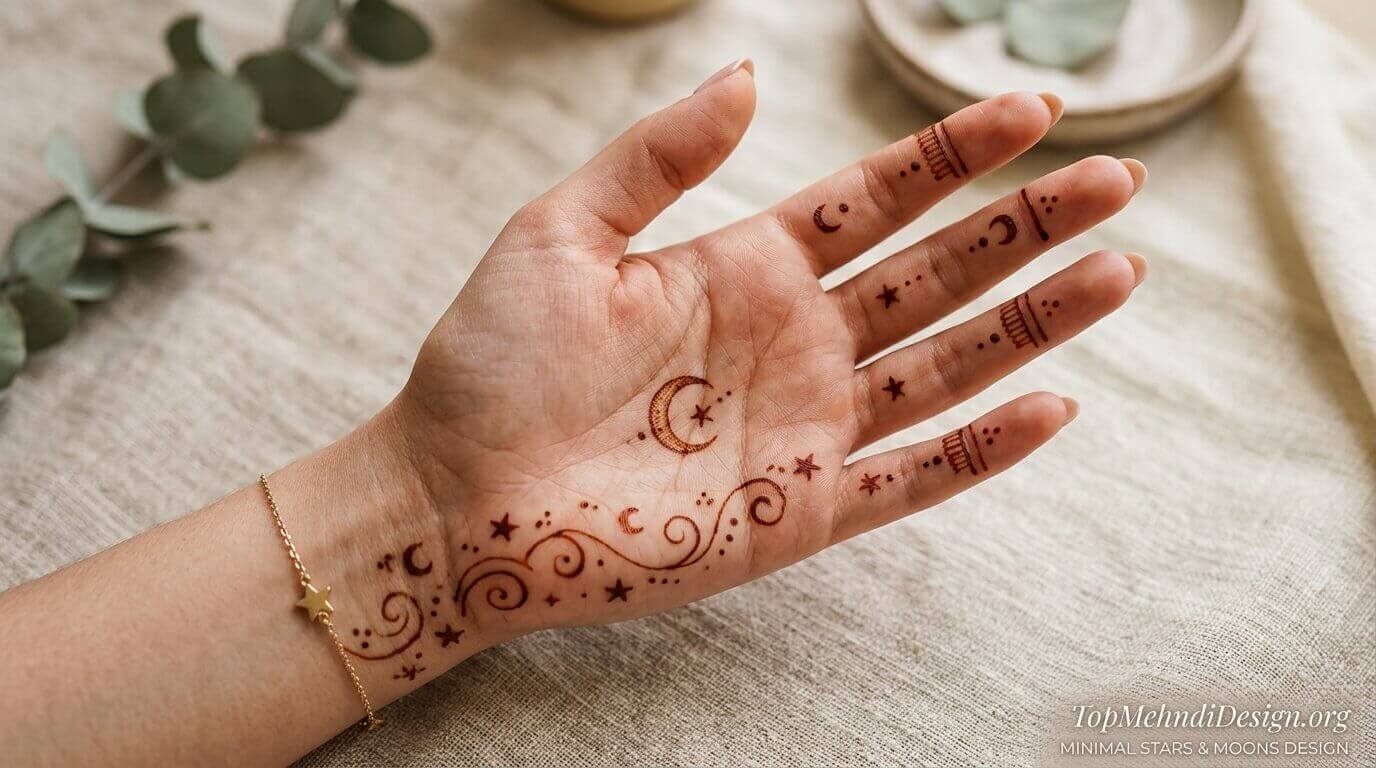
- Celestial palm: Moon, stars, and dot constellation covering the entire palm in cute celestial style
- Finger mehndi with palm center: Elaborate finger designs meeting at a central palm mandala
Cute Front Hand Mehndi for Kids Special Section
- Smiley face on palm: Most requested kids design, takes 5 minutes, children love it
- Flower on each finger: One small flower per finger, colorful and adorable for little girls
- Butterfly on palm: Simple butterfly, cute and quick, safe for children’s skin
- Heart cluster: Small hearts scattered across the palm, sweet and romantic for little girls
- Star palm: Stars of different sizes across the palm, magical and cute for kids
- Cartoon flower design: Simple daisy at the palm center, looks like a cartoon, kids adore it
- Initial with flowers: Child’s name initial surrounded by tiny flowers
- Rainbow dots: Arching dots across the palm in graduated sizes, cheerful and modern
Cute Front Hand Mehndi for Eid 2026 Special Section
- Crescent moon palm with star cluster: Eid symbol on palm, deeply meaningful and cute
- Simple floral palm: Quick, elegant floral for busy Chand Raat evenings, 20 minutes
- Dot mandala with moon: Mandala at the palm center with moon accent, festive and beautiful
- Arabic rose trio: 3 roses across the palm, classic and perfect for Eid celebrations
- Minimal vine trail: Single vine from wrist to finger, chic and quick for working women
- Kids star palm: Star at the child’s palm center with a dot ring, Eid special for little ones
Cute Front Hand Mehndi for Weddings Special Section
- Full rose palm: Large central rose with smaller surrounding roses, bridal-adjacent
- Lotus mandala: Lotus flower mandala at the palm center with finger vine extensions
- Peacock palm full: Complete peacock design occupying the full palm with tail feathers to the wrist
- Floral cuff with palm design: Elaborate wrist cuff connected to a palm floral composition
- Bridal front hand: Symmetric palm design with full finger coverage for wedding occasions
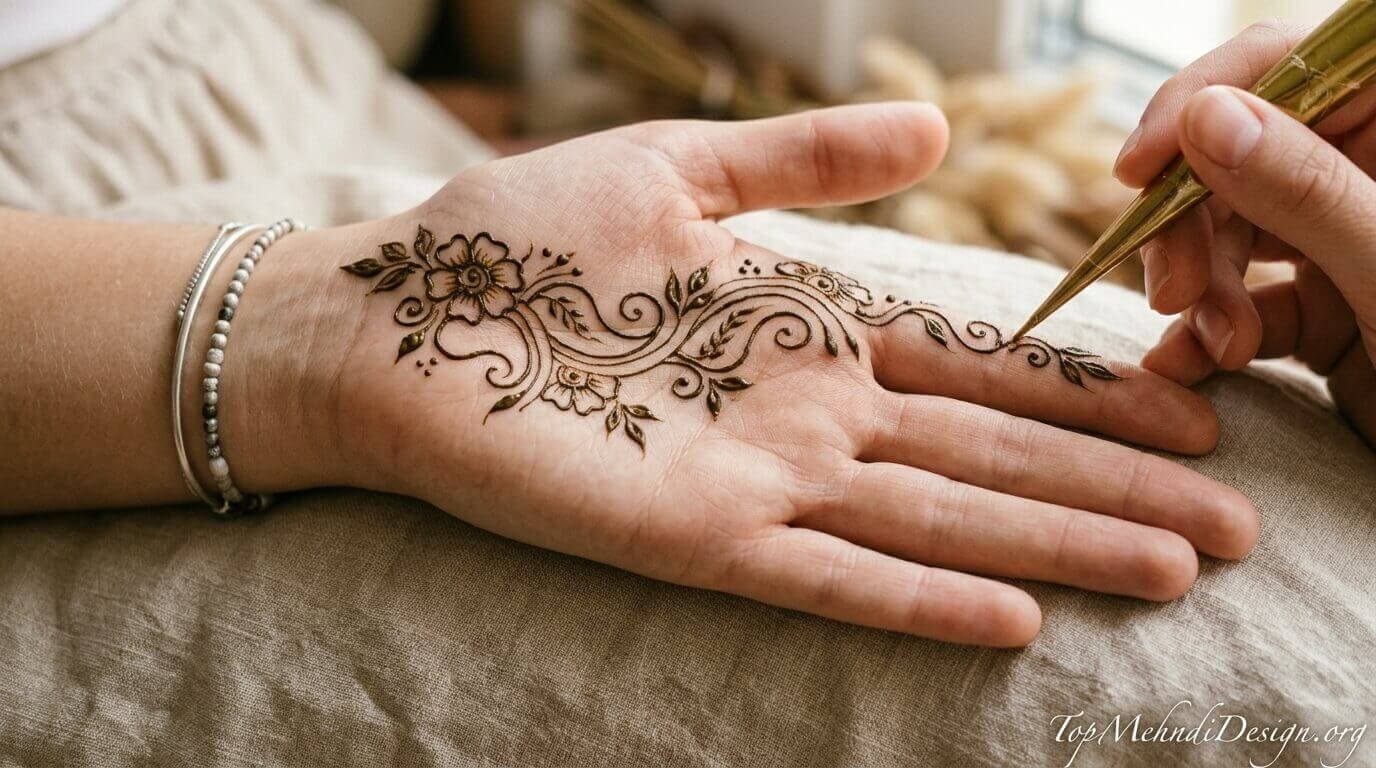
Step-by-Step Instructions: Floral Vine Trail Front Hand
- Prepare your hand completely: Wash your front hand thoroughly with soap. Dry for 5 minutes. Remove all rings. The palm skin must be completely clean and oil-free for the henna to stain properly. Any oil or lotion creates a barrier that prevents the dye from penetrating the skin.
- Hold your cone correctly: Hold the henna cone exactly like you hold a pencil between thumb and index finger, supported by the middle finger. The tip of the cone should point downward at approximately a 45-degree angle to the skin surface. Squeeze from the upper part of the cone, never from the tip.
- Test pressure on paper first: Before touching your palm, squeeze a 5-centimeter test line on plain paper. Adjust the pressure until you can produce a smooth, consistent thin line. This 30-second paper test prevents the most common beginner mistake, applying too much pressure and creating thick blobs.
- Draw the wrist rose first: At the wrist end of your palm, draw one simple Arabic rose. Start with a small center circle, then add 5 curved teardrop petals around it. The rose will anchor the entire vine design and become its most beautiful focal point.
- Draw the main vine from the rose: From the rose, draw one smooth curved vine line traveling diagonally across the palm toward the middle or ring finger. The vine should curve naturally and gently not go perfectly straight. Natural curves always look more beautiful than rigid straight lines in mehndi.
- Add small leaves along the vine: On alternating sides of the vine, draw small teardrop-shaped leaves 5 to 7 total along the vine length. Keep all leaves similar in size. Leaves always point slightly away from the vine, as if growing naturally outward.
- Add a second flower at the vine midpoint: Halfway along the vine, draw a smaller second flower with 4 petals instead of 5, slightly smaller than the wrist rose. This second bloom gives the design a sense of journey and development across the palm.
- Add fingertip accents: Extend the vine’s final stroke up one finger. At the fingertip of that finger, draw a simple fingertip cap, a filled semicircle, or a small band. Optionally add simple dot accents at the tips of 2 other fingers for balance.
- Add dot accents throughout: Scatter small dots near the leaves, beside the flowers, and at empty spaces along the vine where the design needs completeness. Dots are the quickest way to make a design look polished and professional. They fill gaps perfectly.
- Let it dry completely: Do not move your hand or touch the design. Let the henna dry for 20 to 25 minutes. It will begin to look dark and slightly cracked when dry enough for sealing.
- Apply lemon-sugar sealer: Using a cotton ball or your finger, gently dab lemon-sugar mixture over the entire design. This seals moisture into the henna and signals the dye to penetrate more deeply into the skin, dramatically increasing the final stain darkness.
- Leave on as long as possible and remove: Minimum 4 hours gives light orange-brown. 6 to 8 hours gives rich brown. Overnight gives the darkest, most beautiful, longest-lasting stain. Scrape off dried paste gently. Avoid water on the design for 12 hours after removal. Apply coconut oil for shine.
💡 Most Important Beginner Secret: The most common beginner mistake is rushing. Mehndi cone application requires slow, steady, consistent pressure.
Every beautiful mehndi design is just a series of slow, calm strokes. Take your time. Breathe. Let the design grow naturally. Rushed mehndi always looks rushed. Calm mehndi always looks beautiful.
Complete Beginner Practice Plan 5 Days to Beautiful Front Hand Mehndi
This 5-day practice plan is specifically designed to take a complete beginner to a confident front-hand mehndi application. Each day builds on the previous one, developing the fundamental skills needed for beautiful Beginner Cute Simple Mehndi Designs for Front Hands 2026:
Day 1: Cone Control Practice on Paper
Spend 20 minutes drawing lines, curves, circles, dots, and teardrop shapes on plain white paper using your henna cone.
Focus entirely on pressure control, the most fundamental skill in mehndi. Draw each shape at least 15 times.
Do not apply to the skin today. Paper practice is free, consequence-free, and builds hand confidence faster than anything else.
Day 2: Basic Shapes on Paper + Forearm Skin
Practice drawing flowers (5 petals), simple leaves, dots, and small vines on paper first. Then draw 3 to 5 simple shapes on your forearm, in a location where mistakes are less visible.
Observe how henna looks on skin versus paper, how the color develops over hours, and how different pressures affect line thickness. Photograph your forearm designs and compare them to your reference images.
Day 3: First Front-Hand Design
Apply your first beginner cute simple mehndi design for front hand. Choose a Level 1 design maximum 2 elements. A single flower with 3 leaf accents is perfect. Do not attempt anything complex on Day 3.
Focus entirely on applying the design calmly and correctly, not on making it elaborate. Photograph the result and observe what went well and what to improve.
Day 4: Level 2 Design Attempt
Now attempt a Level 2 design, a floral vine trail or palm mandala with a wrist band. You have already practiced cone control for 3 days, your hand is steadier, and your pressure is more consistent.
The Level 2 design will feel achievable, and the result will look genuinely beautiful. Share your design photograph with family or on social media.
Day 5: Build Your Personal Style
On Day 5, combine elements you liked from Days 3 and 4 to create your own original front-hand design. This is where your personal mehndi style begins to emerge.
Every great mehndi artist started here, combining familiar elements in a new way. Your Day 5 design will look noticeably better than your Day 3 design, proving that just 5 days of practice produces real, visible improvement.
📅 Practice Tip: 5 days of 20 minutes each (total 100 minutes) is all it takes to go from complete beginner to confident basic mehndi application.
Consistency beats the length of practice sessions every time. 20 focused minutes per day transforms your cone control faster than one 3-hour practice session per week!
Best Beginner Cute Simple Mehndi Designs for Front Hands By Occasion
For Eid 2026
- Crescent moon with star cluster on palm: Most meaningful Eid choice, 15 minutes
- Simple Arabic rose trio: 3 roses across palm, classic and festive, 20 minutes
- Floral vine trail: Elegant vine from wrist to finger, suitable for all ages on Eid
- Dot mandala: Palm center mandala with dot composition, traditional and beautiful
- Kids fingertip flowers: One small flower per fingertip for little girls on Eid morning
🌙 Eid Tip: Apply your front hand mehndi on Chand Raat evening. Leave paste overnight for the darkest, most beautiful color by Eid morning. The front-hand design will look stunning throughout all three days of Eid celebrations and in every family photograph!
For Weddings and Engagements
- Full floral palm: Multiple flowers covering the palm with elegant negative space
- Mandala with finger coverage: Palm mandala extending up all fingers
- Arabic floral with wrist cuff: Large florals on palm plus decorative wrist band
- Lotus mandala: Central lotus at the palm, creating a complete royal composition
- Peacock front hand: Peacock motif on the palm for a unique and unforgettable bridal look
For Casual Daily Wear
- Single small flower: Most minimal, 8 minutes, suitable for office and college
- Fingertip bands only: Quick, neat, and professional looking for daily wear
- Single vine trail: Elegant, minimal vine, chic and modern for everyday beauty
- Dot bracelet only: Simple wrist dots, fastest complete mehndi look available
For Kids and Young Girls
- Smiley face on palm: Kids’ absolute favorite, 5 minutes, always creates excitement
- Butterfly on palm: Magical and cute, every little girl loves it
- Heart scatter: Small hearts across the palm, sweet and romantic for young girls
- Star cluster: Stars of different sizes, magical and joyful for children
Expert Color Tips: How to Get Darkest Front Hand Mehndi Stain for Beginners
The most important thing after drawing your beautiful beginner cute simple mehndi design for front hands is getting the deepest, darkest, most beautiful stain possible. Here are the exact techniques used by professional mehndi artists:
- Always use fresh henna paste, and check the manufacturer’s date. Henna older than 3 months gives weak, faded color without the rich brown tones that make front hand designs look stunning
- Palm skin must be completely clean, washed with soap, and all oil and lotion. Any barrier on the skin prevents proper henna staining
- Apply lemon-sugar immediately as the design begins drying, dabbing over the design with a cotton ball. This is the single most impactful step for color depth
- Leave paste on for a minimum of 6 hours, 4 hours gives light orange. 6 to 8 hours gives a deep brown. Overnight gives the richest, darkest, most beautiful stain possible
- The clove smoke method holds the dried henna design over the smoke from burning cloves for 30 to 45 seconds. This heat dramatically deepens the final stain color, a professional technique used at weddings
- Avoid water on the front hand for 12 hours after removing the paste. Water stops the color development process that continues for 24 to 48 hours after paste removal
- Apply mustard oil or coconut oil immediately after paste removal. Oil protects the stain from fading and adds a beautiful natural shine
- Keep your hands warm after paste removal, as heat activates the henna dye. Wrap hands in a warm cloth or stay in a warm room to develop the richest possible color
🌟 Color Secret: Front hand (palm) mehndi always comes out darker than back hand mehndi because the palm skin is thicker and absorbs more henna dye.
Your front hand designs will naturally show richer, deeper color than the same design on the back of the hand, making the front hand the most rewarding canvas for beautiful henna art!
7 Most Common Beginner Mistakes And How to Fix Them
Every beginner makes these mistakes. Knowing them in advance helps you avoid them completely:
Mistake 1: Too Much Pressure on the Cone
The most common beginner mistake. Too much pressure creates thick blobs instead of clean thin lines, and the design loses all its delicate detail.
Fix: Practice on paper for 5 minutes before applying to skin. Learn to apply only the gentlest, most consistent pressure just enough to produce a thin, smooth line.
Mistake 2: Applying on Oily or Wet Skin
Oil and moisture on the skin create an invisible barrier that prevents henna from staining properly. The design may look beautiful when applied, but it produces a very faint, disappointing color after paste removal.
Fix: Always wash hands thoroughly with soap, dry completely for 5 minutes, then apply. Never apply lotion or oil before mehndi.
Mistake 3: Removing Paste Too Quickly
Removing the paste after only 1 to 2 hours gives a very light orange stain that fades within 3 to 4 days.
Fix: Leave paste on for a minimum of 6 hours. If possible, apply in the evening and leave overnight. Patience is the most powerful mehndi technique.
Mistake 4: Washing Immediately After Paste Removal
Water on fresh mehndi immediately after paste removal washes away the surface dye before it has fully oxidized and darkened.
Fix: Avoid water on the design for 12 hours after paste removal. If hands must be washed, apply coconut oil over the design first as a protective barrier.
Mistake 5: Copying Designs Too Complex for Your Level
Beginners who attempt Level 3 or professional designs on their first try get frustrated when results do not match the reference image.
Fix: Always start with Level 1 designs and build confidence progressively. A simple design drawn confidently looks far more beautiful than a complex design drawn nervously.
Mistake 6: Not letting the design dry fully before moving
Moving your hand or touching the design before it is fully dry creates smudges and ruins the entire composition.
Fix: After completing the design, do not move your hand for 20 to 25 minutes. Sit comfortably, relax, and let the henna dry completely before any movement.
Mistake 7: Using Expired or Poor Quality Henna
Old or poor-quality henna paste gives a weak, faded color regardless of how long it is left on or how carefully aftercare is followed.
Fix: Always use fresh henna from a reputable brand. Check the manufacturer’s date before purchase. Fresh, high-quality henna is the foundation of every beautiful mehndi design.
Conclusion
Beginner Cute Simple Mehndi Designs for Front Hands 2026 are proof that the most beautiful art does not require years of training or professional equipment.
A fresh henna cone, a clean palm, 20 minutes of focused attention, and the beginner designs in this guide are all you need to create front hand mehndi that looks genuinely beautiful, genuinely cute, and genuinely worthy of every compliment and photograph.
The front hand has been a canvas for mehndi art for thousands of years across Pakistan, India, and the Muslim world. Every professional mehndi artist, every celebrated henna designer, every woman whose work you admire on Instagram and Pinterest, every single one of them began exactly where you are right now.
With a beginner cute simple mehndi design for front hands. With one flower. With one vine. With one first attempt. Start with Level 1 today. Practice for 5 days following the plan in this guide. Build your confidence one beautiful design at a time.
Within two weeks, your front hand mehndi will look professional, your cone control will be confident, and your personal style will begin to emerge. The most beautiful front hand mehndi you will ever create is always the next one. Start now.
FAQs
1. What is the easiest cute mehndi design for front-hand beginners?
The single flower design, one 5-petal flower at the palm center with 3 small leaf accents, is the easiest and cutest front hand mehndi design for absolute beginners. It requires only basic petal and leaf shapes, takes 8 to 10 minutes, and looks completely beautiful and professional on the front hand. This is the ideal first mehndi design for anyone starting their henna journey.
2. How long does beginner front hand mehndi take to apply?
Level 1 beginner designs take 8 to 15 minutes. Level 2 designs take 15 to 30 minutes. Level 3 confident beginner designs take 30 to 50 minutes. The front hand is generally faster to apply than the back hand because the flat palm surface allows more comfortable and quicker application. Even a beautiful floral vine trail takes only 20 minutes once you have practiced for a few days.
3. Which front hand mehndi design looks cutest in photos?
The mandala design looks cutest and most photogenic on the front hand in photos because its circular symmetry is perfectly framed by the palm shape. The full moon mandala design at the palm center photographs beautifully from every angle and in every lighting condition. Floral vine trails are the second most photogenic front-hand design. The diagonal flow creates a beautiful dynamic composition in photographs.
4. Can children apply beginner front hand mehndi?
Yes! Children can safely use natural henna for hand mehndi designs. Always use 100% natural henna paste, never black henna, which contains harmful chemicals. For young children aged 5 to 10, keep designs small and simple: a flower on the palm, a star, or a heart. The application should be quick (under 10 minutes), and the paste should be removed after 2 to 3 hours for young children. Always do a small patch test first on any child’s skin.
5. Is front-hand or back-hand mehndi better for beginners?
Front hand mehndi is better for beginners for three key reasons. The flat palm surface is easier to draw on than the curved back of the hand. Self-application is more comfortable because you can rest your front hand flat in your lap or on a table. And front hand mehndi produces darker stains because palm skin absorbs more henna dye than back hand skin. Start with front-hand designs and progress to back-hand once your cone control is confident.
6. How do I make my front hand mehndi design darker?
Six steps for the darkest front hand mehndi stain: (1) Use fresh henna paste. (2) Apply to completely clean, oil-free palm skin. (3) Apply lemon-sugar mixture as the design dries. (4) Leave paste on overnight, minimum 8 hours for the front hand. (5) Use the clove smoke technique after drying. (6) Avoid water for 12 hours after paste removal and apply coconut oil immediately. Following all 6 steps consistently produces the darkest possible mehndi stain every time.
7. What are the best cute front hand mehndi designs for Eid 2026?
The most recommended beginner cute simple mehndi designs for front hands for Eid 2026 are: the crescent moon with star cluster (most meaningful for Eid, 15 minutes), the simple Arabic rose trio (classic and festive, 20 minutes), the floral vine trail (elegant and suitable for all ages, 25 minutes), and the dot mandala (traditional and beautiful, 20 minutes). Apply on Chand Raat evening and leave overnight for the most beautiful color by Eid morning prayers.
8. How long do beginner front-hand mehndi designs last?
With proper aftercare, beginner cute simple mehndi designs for the front of the hands last 10 to 15 days. The front hand (palm) typically retains mehndi color longer than the back hand because palm skin is thicker and absorbs more dye.
The first 3 to 5 days show the darkest, most beautiful stain. Daily coconut oil application and avoiding harsh soaps on the design area extend the beautiful stain significantly.